Basic Peppermill
Introduction
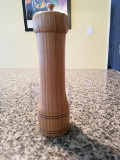
 This paper documents the steps to turn a basic peppermill design on the wood lathe using the Rockler 8” peppermill kit (#50936). It will take 4 to 4-1/2 hours to build.
Safety

Safety is important in all aspects for woodworking, but particularly so with working on the wood lathe. Wood sometimes can be unstable, possibly not secured to the lathe properly, etc. Wearing the right type of safety equipment is imperative.
It is wise to use both safety glasses and a face shield. Protect your hearing with hearing protectors such as sound deadening headphones. Depending on the wood, a dust mask is needed. Remember you have one life, one face, one set of lungs. It only takes one accident to change or even terminate your life.
Tools
Here is a list of tools needed for turning your peppermill:
- Spur center
- Live center - conical
- Chuck with jaws
- 1-5/8” Forstner bit
- 1-1/16” Forstner bit
- 3/4” Forstner bit
- 10” Forstner bit extender
- 7mm (5/16”) Bradpoint bit
- Drill chuck in tail stock (aka Jacob’s Chuck)
- Depth gauge
- Outside calipers
- (Optional) Wire burn tool (old guitar strings work well here too)
- Parting tool
- Roughing gouge or round carbide tool
- Beading tool (Ellsworth style is a good choice or a Sorby Easy Beader) or diamond carbide tool
- Scraper or square carbide tool
- Fingernail spindle gouge
Supplies
Here is a list of supplies you will need for turning your simple bowl:
- Wood – 3” X 3” X 10” billet, any specie, preferably a tight grained wood.
- Various grits of sandpaper. A woodturner’s sand pack is good to have on hand.
- Wood sealer suitable for woodturning.
- Friction finish suitable for woodturning.
- Paper towels for applying the sealer and finish.
- 0000 Steel wool for smoothing the wood sealer.
- Rockler 8” Peppermill Kit (#50936)
Procedure
Cut 90o square blank 2-½” - 3” by 12” long. Mark for the centers by using a straight edge and pencil mark on both ends. Mark from one corner to the opposite corner. Follow by marking the adjacent corner to its opposite corner. You will see an “X” when done correctly. Punch a dimple at the center point. Using an awl, rest the side of the awl on top of the end with the point at the penciled crosshairs. Stand the awl up and with your palm, strike the awl until a definite dimple is made.
On the lathe we will start with a spur center in the headstock and the conical center in the tailstock. When using the spur center it is good to use a hammer and seat the spur on one end of the billet.
Mount the billet between the spur center on the headstock and the conical center on the tailstock. Position the tool rest according to the corner so that it clears the tool rest by about 3/8”.
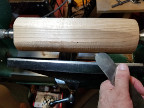
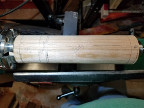
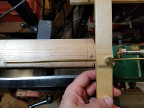
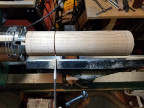
Rough to 2-1/2” round. Depending on the tools you have at hand, you can use a round carbide tool or a roughing gouge. You will likely need to reposition the tool rest as the billet rounds.

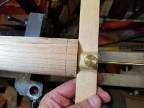
Square up the right end and cut a dove-tailed tenon on right side. This will later be turned around and mounted on a chuck.
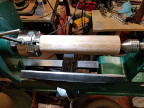
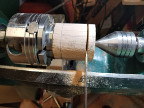
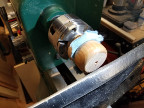
Remount tenon-side in the chuck/jaw Set up the Jacob’s chuck in tailstock to drill center hole. The left side will be the cap. The right side will be the bottom of the body. Mark off depth. From the right side, mark at 5/8”, 6-3/8” for the body, a gap the size of your parting tool (e.g. 1/8” for a 1/16” parting tool), 1/2” for the tenon of the cap and 2” for the cap.
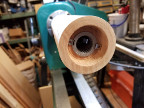
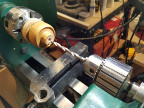
With a 1-5/8” forstner bit, drill to depth of 5/8”, checking with a depth gauge. We will later trim the bottom sto the final depth is 1/2”.
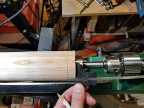
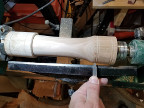
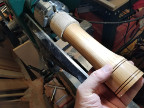
With a 1-1/16” forstner bit and 10” extender, continue to drill the second hole. You can begin drilling the hole without the extender until you run out of length. Use the depth gauge to test the depth to end at the end of the body.
Another method for estimating your depth is to use painter’s tape on the shaft of the extender. But insure accuracy using the depth gauge.
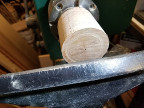
Reposition tool rest parallel to end. Square end (cleanup cut). Check depth to insure that it isn’t too shallow.
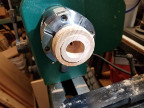
Create footing. Round in from the outside toward the center. This will help the peppermill to sit flat over time.
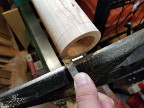
Test fit of hardware in the bottom of the peppermill. Trim out hole as needed to insure it will fit comfortably.
Remove hardware. Sand and smooth inside the foot.
Mount the conical live center in the tailstock. Butt the live center in the bottom of the body again to better support the piece.
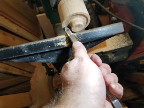
Using the parting tool, partially part off between cap and body. This is just to better delineate the mark between the two pieces.
Set outside calipers to 2” (the minimum size the body can be without turning through into the inside hole).
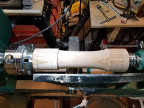
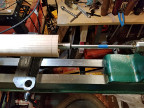
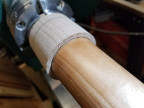
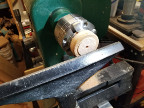
Create the final shape of the body. Start by squaring up (again) the bottom/right side. Shape the basic curve on the piece. Use calipers to prevent cutting too much off. Design should be a little thinner on top than bottom. The top will need to fit into a recess we will cut later in the cap.
Clean up with 150 grit.
Optionally, use the Easy Beader to create beads on bottom section. The diamond carbide tool can also be used. You can also use a wire burner to emphasize the beading.
Check the squareness of the footer again. Clean up the footer by making light cuts with the tool rest parallel with the body using the square carbide tool.

Sand up through the grits and lay final finish on the body.
Remove live center. Part off body section.
Clean up 1” hole on topside of the body with sandpaper if needed. Finish the topside by hand.
Square up bottom of cap section.
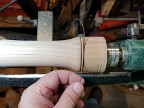
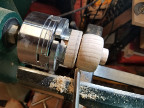
Create a 1/2” long tenon on the right side of the cap section. First turn a part down until 1” diameter. Finish cutting down the remainder of the tenon. Periodically test with the hole in the top of the body section. Fit should not be too loose or too tight.

While body section is mounted on the tenon, mark the width onto bottom of the cap section.
Cut mortise around tenon, leaving a broad footing. This allows the top section to fit over the body section and more gracefully cover the sharp top edge of the body. Square tenon end. There is hardware that will be screwed onto the bottom of the tenon itself.
Make partial part on the left side of the cap.
Shape the cap.
Sand up through the grits and finish the exposed portion of the cap.
Drill 7mm hole past the cap. The rod will reach from the bottom of the peppermill out through the top of the cap.
Finish bottom and side of cap. Part off.
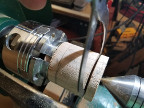
Create a jam chuck using scrap left in chuck. Square off end. Assist this process by using a 3/4” forstner bit and open a larger hole down a little more than the depth of the tenon on the cap. Open the mortise on the scrap so that the tenon on the cap fits snugly into jam chuck. You’ll likely need to use the fingernail spindle gouge to do this.

Use paper towel to wedge cap into jam chuck and mount conical live center onto the top side of cap.
Finish turning curve on top of cap. Flatten a spot where the hardware finial will sit. Sand and finish.
Sand through the grits and finish cap.
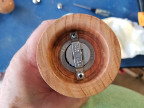
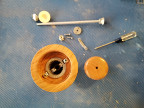
Assemble. Start by temporarily screwing in the lower guide with grinder in the bottom of the body.
Using the rod as a guide, mount the plate to cap.
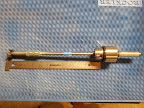
Remove screws from bottom of body and put rod in with the dasher (the grinding disk) and screw retaining bar over the rod with dasher and grinder.
Put cap over the rod. Screw the finial onto the rod at the top of the cap. You should be able to adjust the grind of pepper by adjusting how tight the finial is screwed onto the rod.