I have been asked what hobby is my favorite. I usually reply that hobbies is my hobby. For me, the enjoyment is the challenge for learning something new and apply some creativity in making something.
My hobbies include stained glass, pottery, woodworking, some metal (though I’m not really good at it). I’ve also done lighter hobbies such as floral arranging, thread related (macramé, crochet, tatting, knitting) and soap making. This area highlights some of my work and techniques I have found useful.
1 - Woodworking
There is nothing like the feel of finished wood. It is organic and takes on a life of its own. My main hobby these days (when not on the computer) is working with wood. Making wooden objects provide a form for leaving a legacy to those I care most.
Introduction
I enjoy woodworking as well as working with pottery. I, like many from my generation, took "shop" class in junior high. I appreciated, then and now, my teacher Mr. Newell who was a quiet but firm man who was really patient with us guys to learn both wood and metal working. When I was in high school, I was able to learn more from him as he moved over to the high school at the same time I entered high school.
As an adult, married with children, I started working with pottery again. The problem I had was in working with clay, you wait on it working with it when it was ready. I found that woodworking was the opposite. Wood waits on you. With active kids, I couldn’t depend on being there for the clay, but the wood would patiently wait for me to pick it up again as I had time.
This woodworking section, I have some how-to tutorials that I have used in teaching woodworking classes. I also have some photo galleries that show off some of my work.
1.1 - Woodworking Photo Gallery
Here are some photos of my woodworking projects.
1.1.1 - Woodworking Jigs and Tools
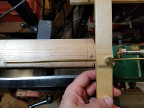
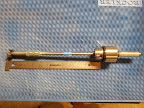
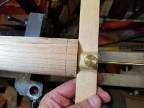
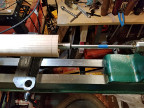
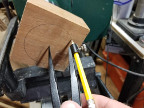
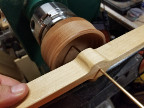
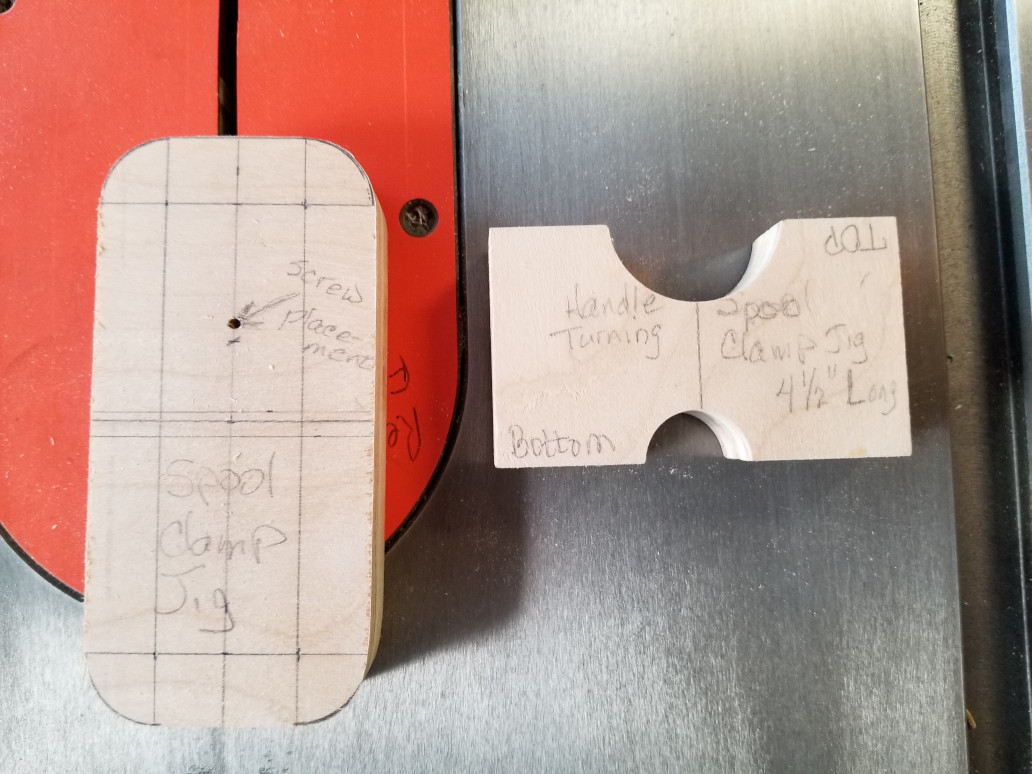
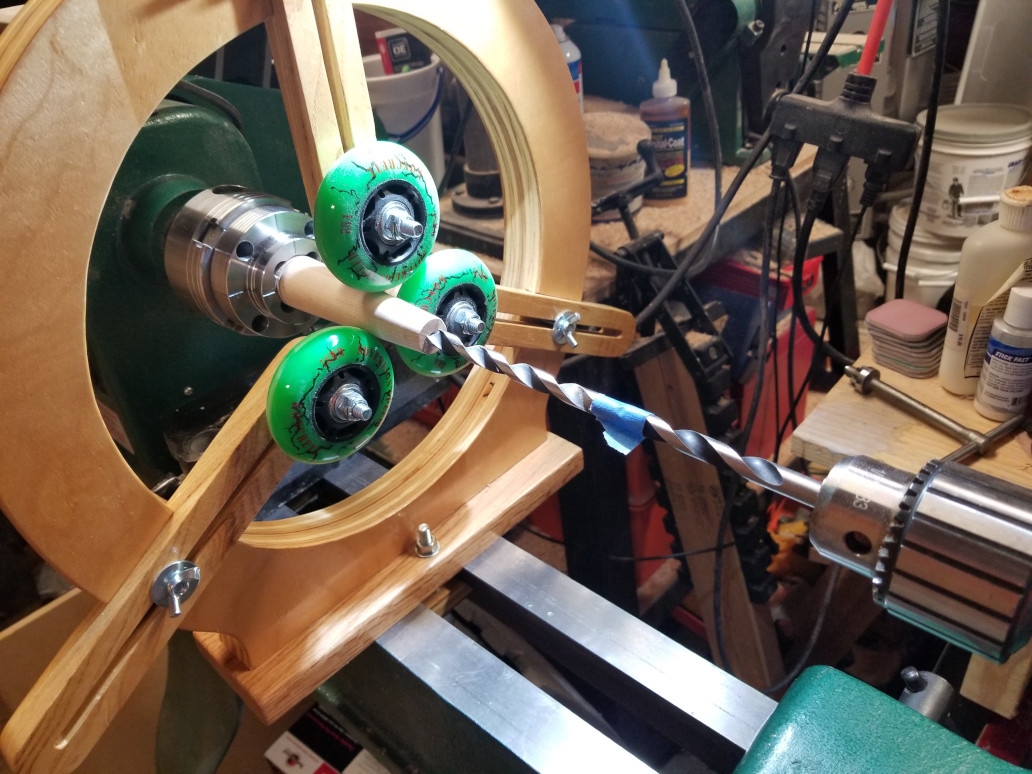
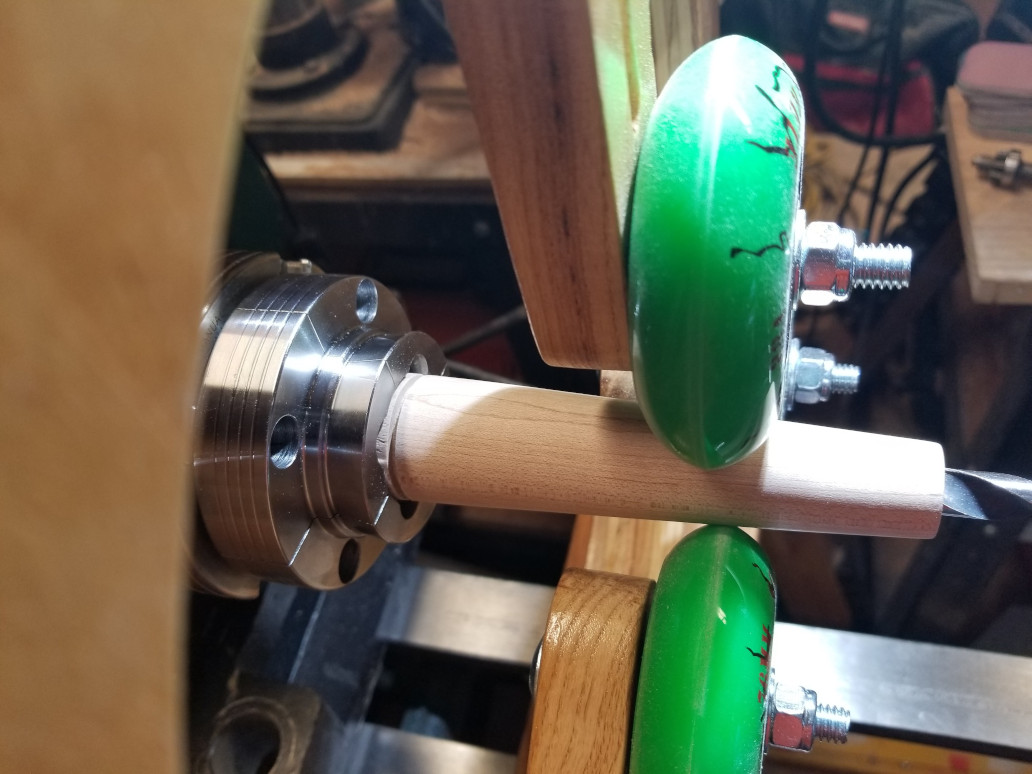
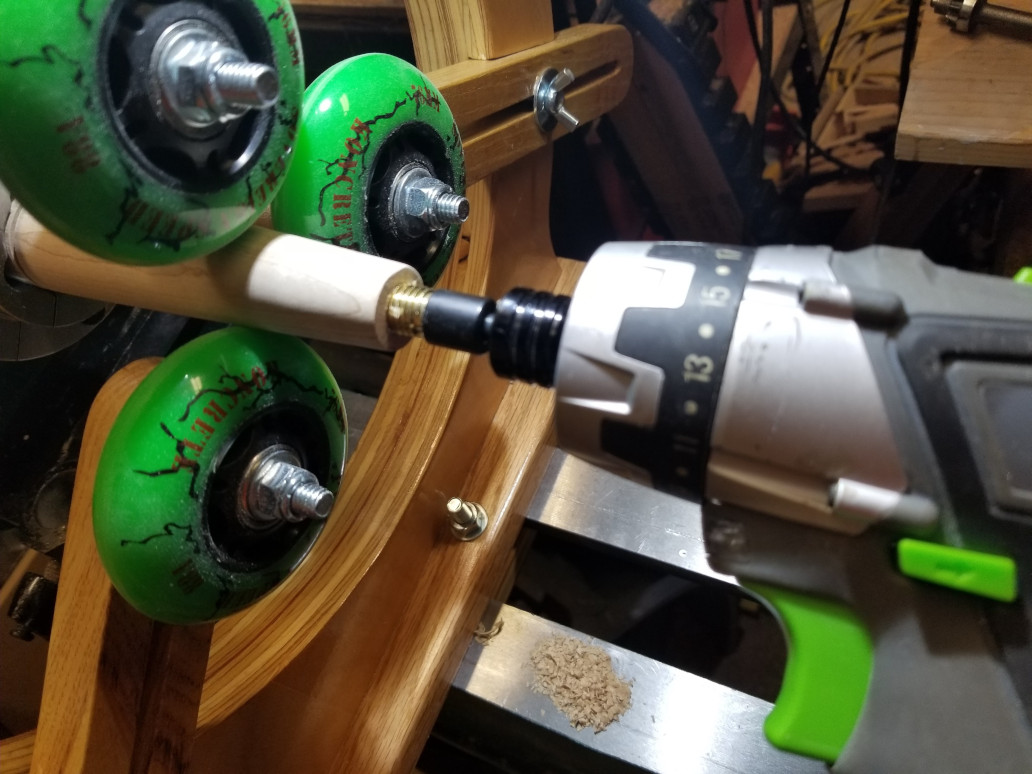
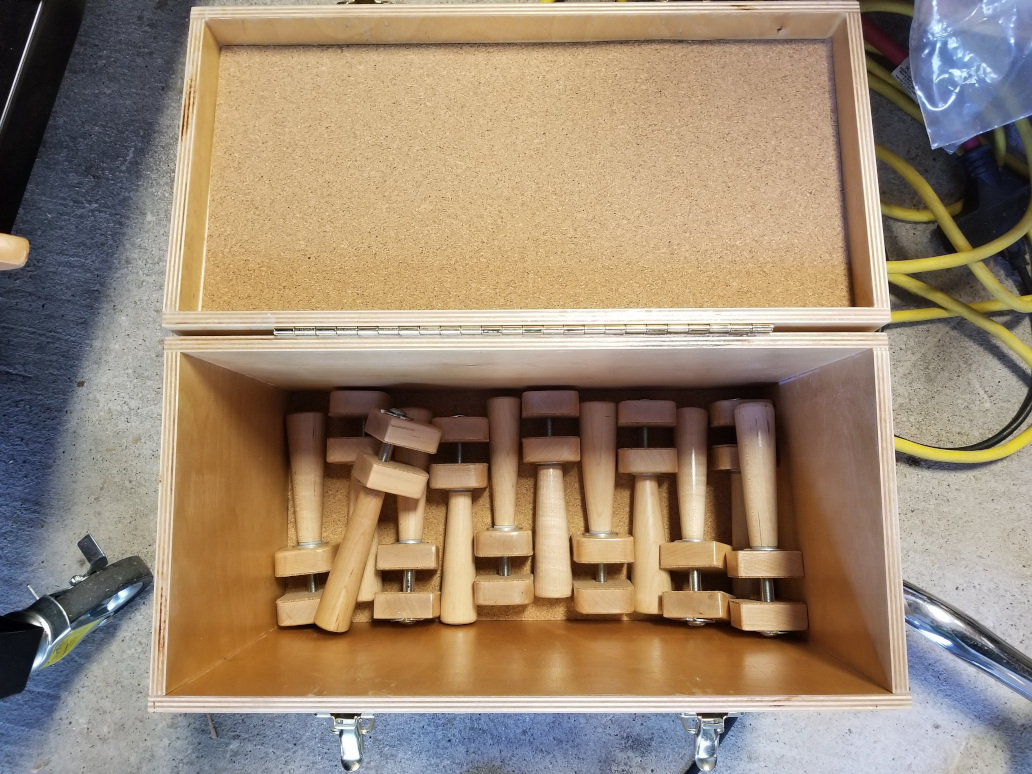
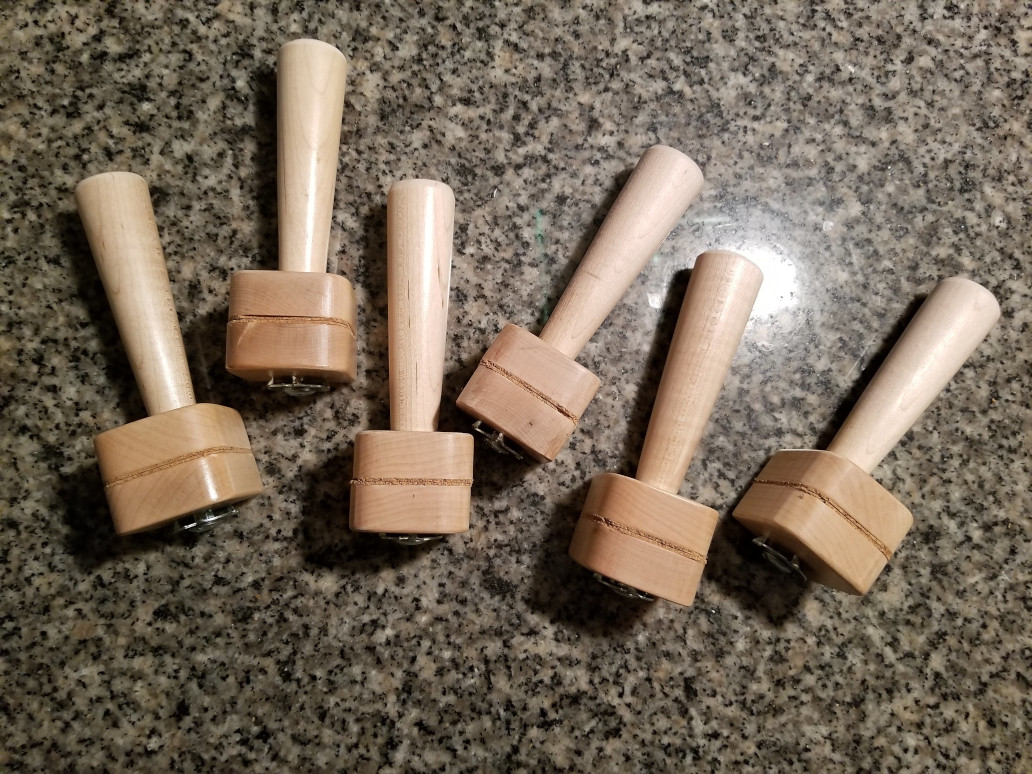
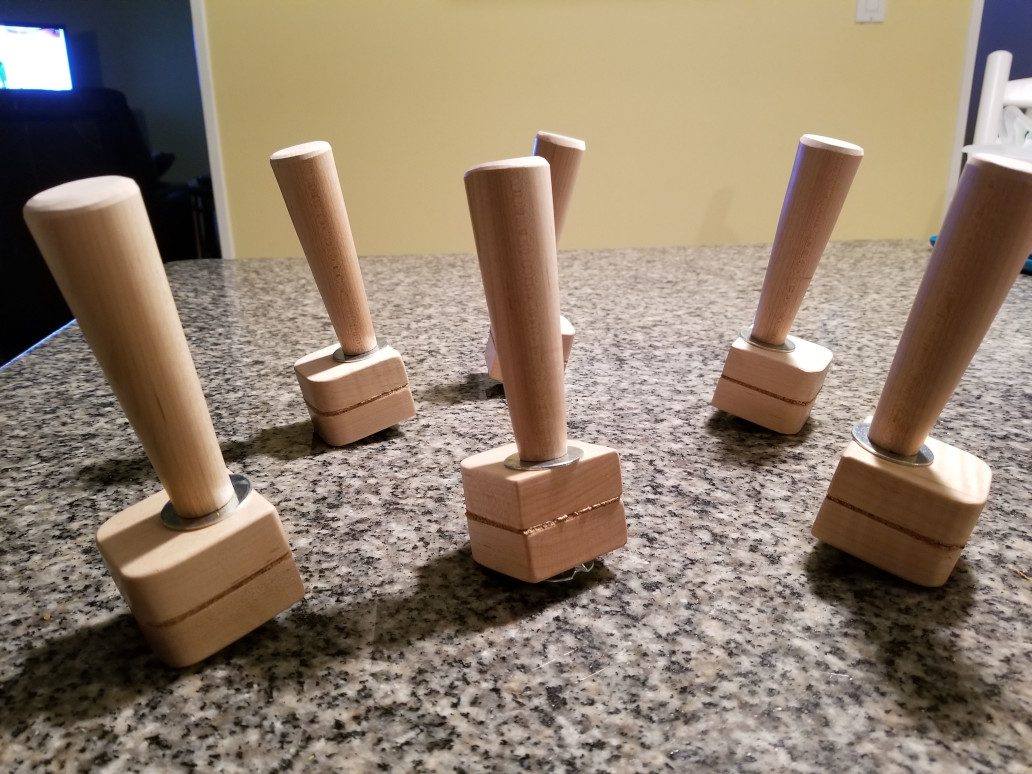
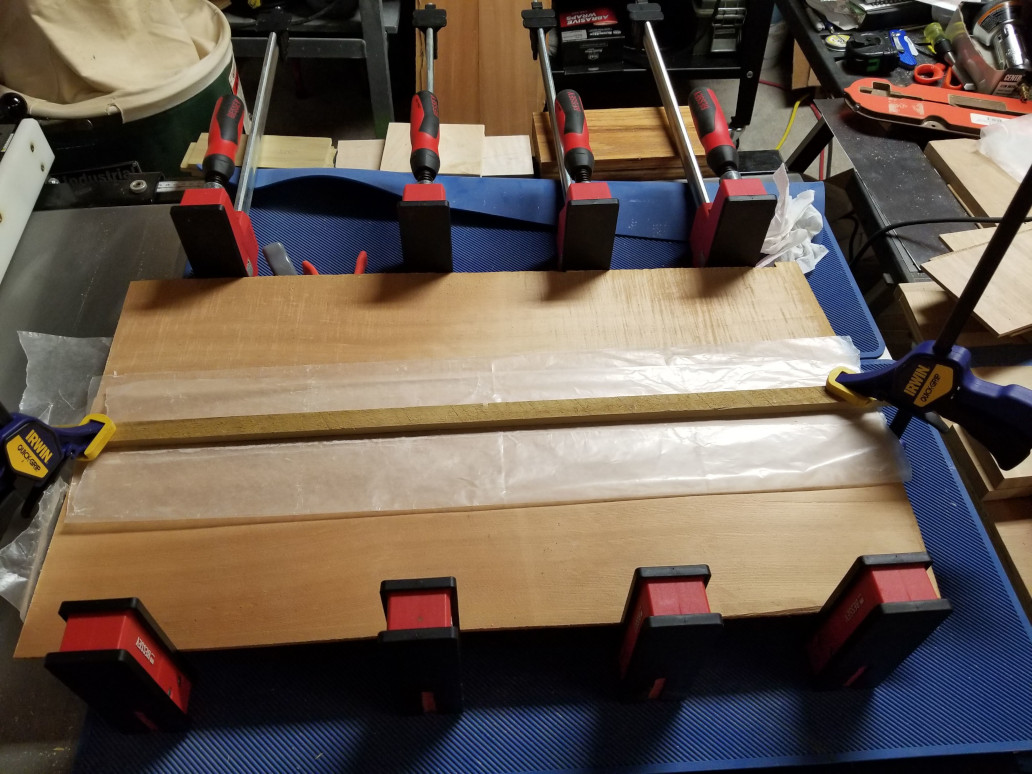
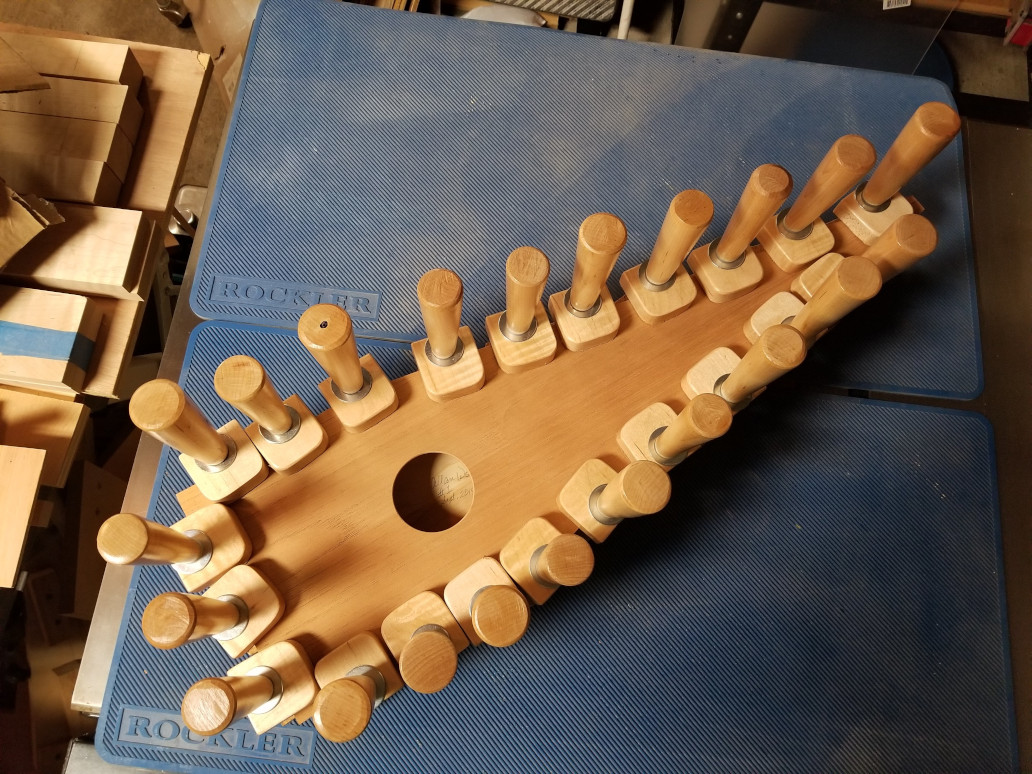
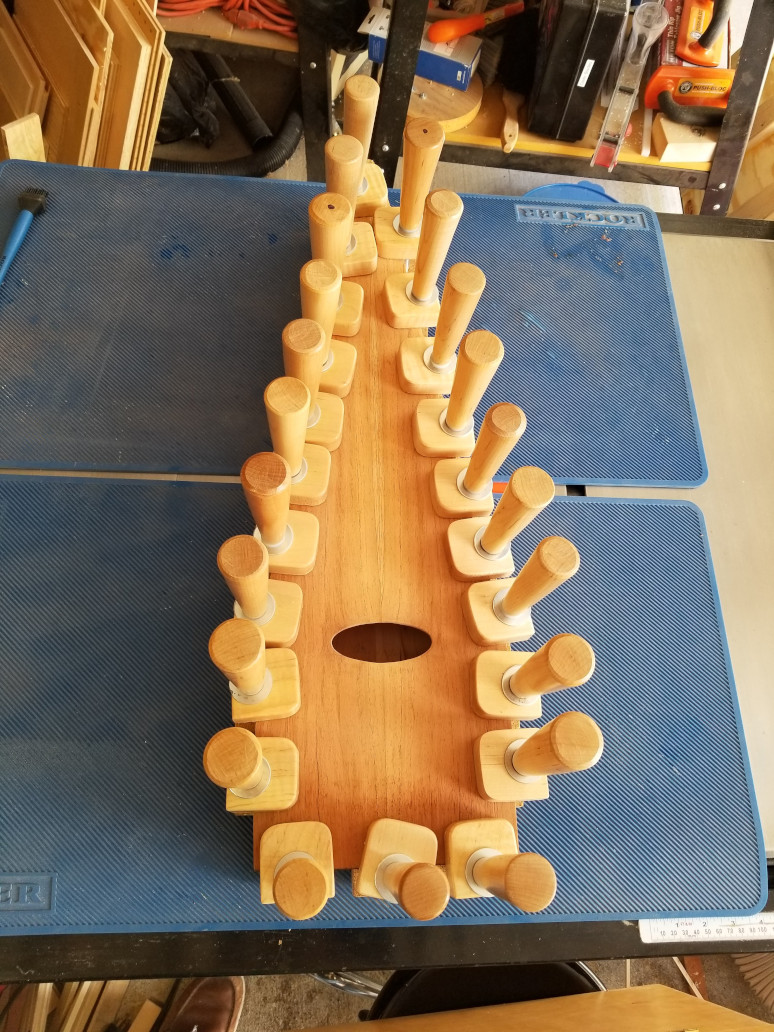
1.1.1.1 - Spool Clamps
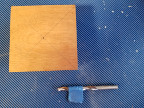
Here are pictures of some spool clamps that I made to clamp the soundboard and back to my bowed psalteries.
01 spool clamp build
02 spool clamp build
03 spool clamp build
04 spool clamp build
05 spool clamp build
06 spool clamp build
07 spool clamp build
08 spool clamp build
09 spool clamp build
10 spool clamp build
11 spool clamp build
12 spool clamp build
13 spool clamp build
14 spool clamp build
15 spool clamp build
16 spool clamp build
17 spool clamp build
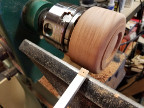
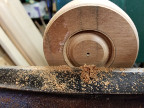
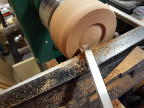
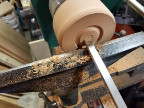
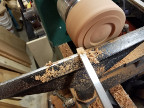
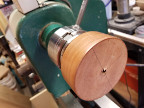
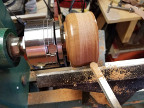
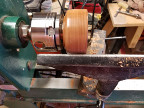
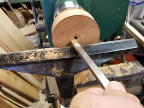
1.1.2 - Bowls
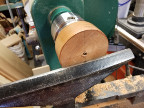
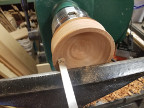
01 maple bowl on lathe
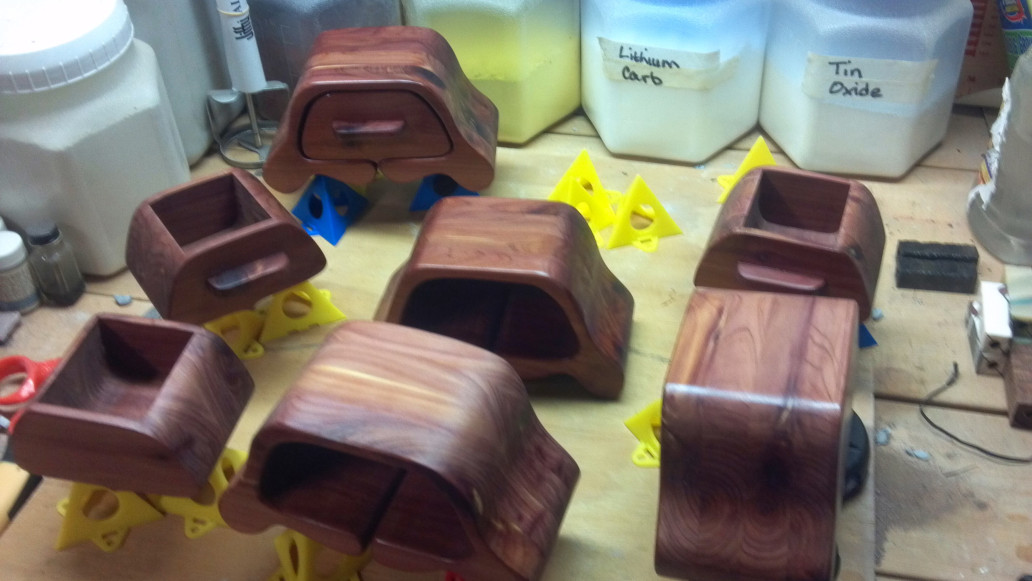
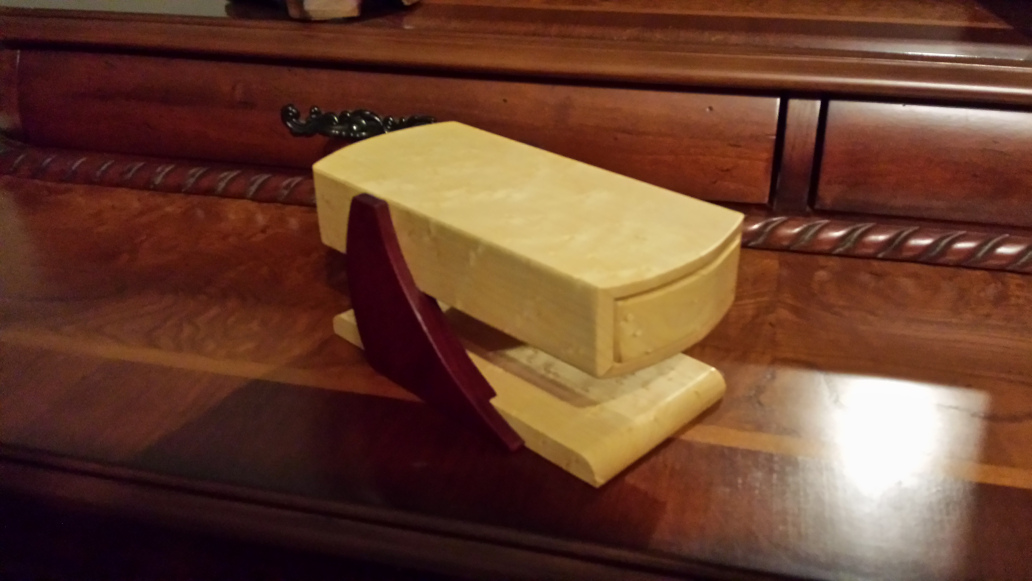
1.1.3 - Boxes
01 bandsaw boxes
02 cantilevered jewelry box
03 cantilevered jewelry box
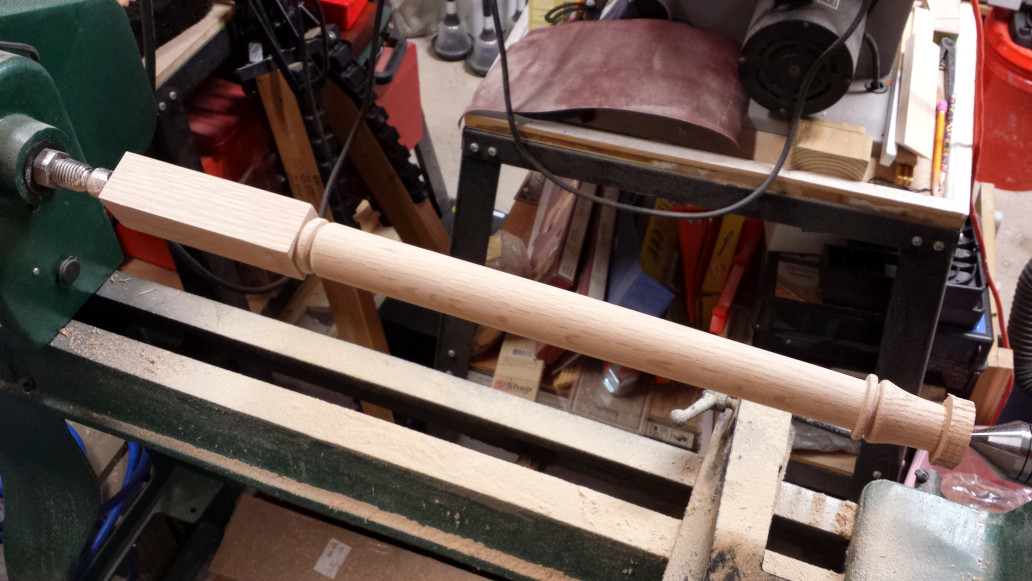
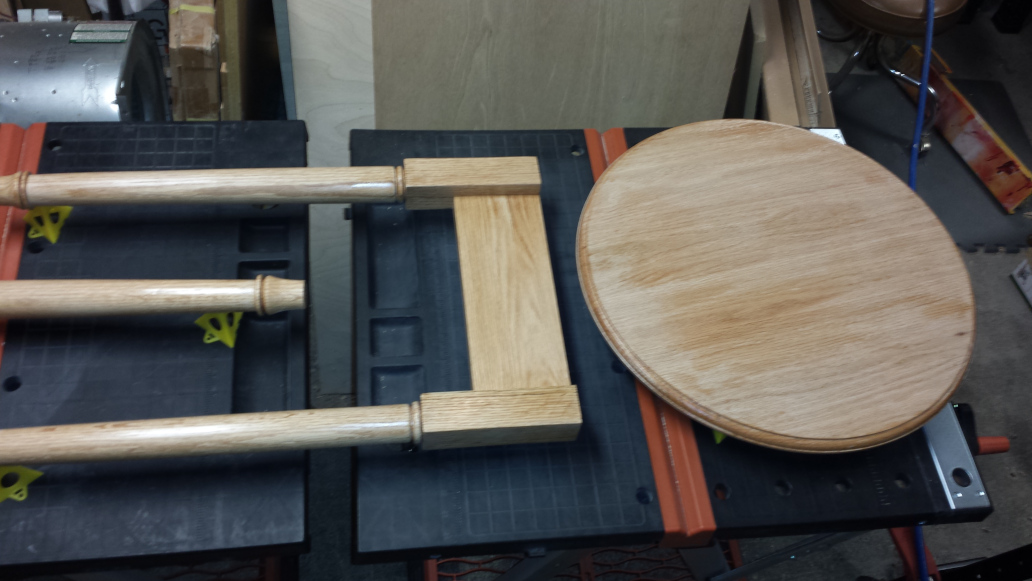
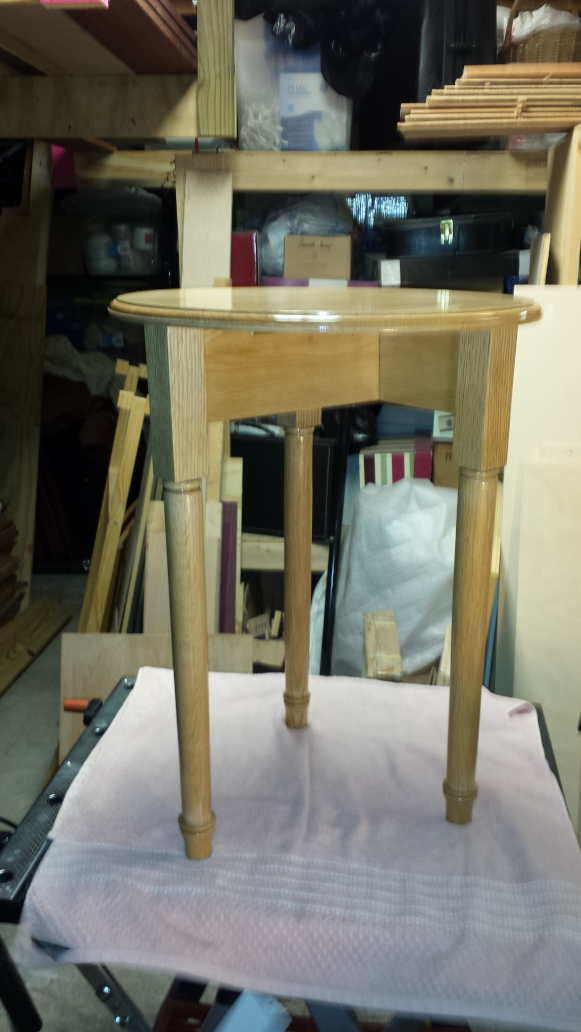
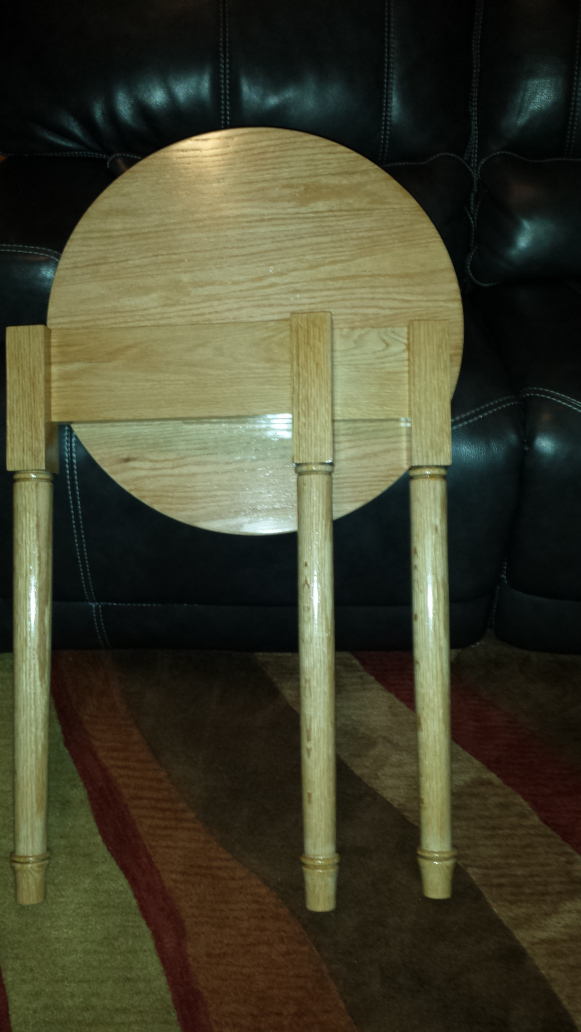
1.1.4 - Furniture
01 three leg table
02 three leg table
03 three leg table
04 three leg table
05 three leg table
06 three leg table
10 curved leg table rough cut
1.1.5 - Musical Instruments
Here are some photos of musical instruments that I have made.
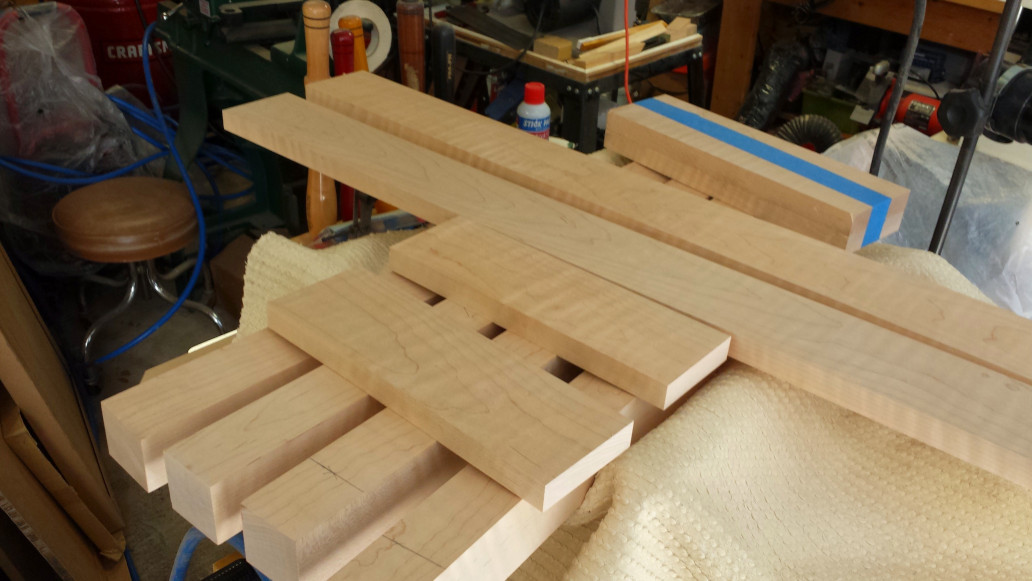
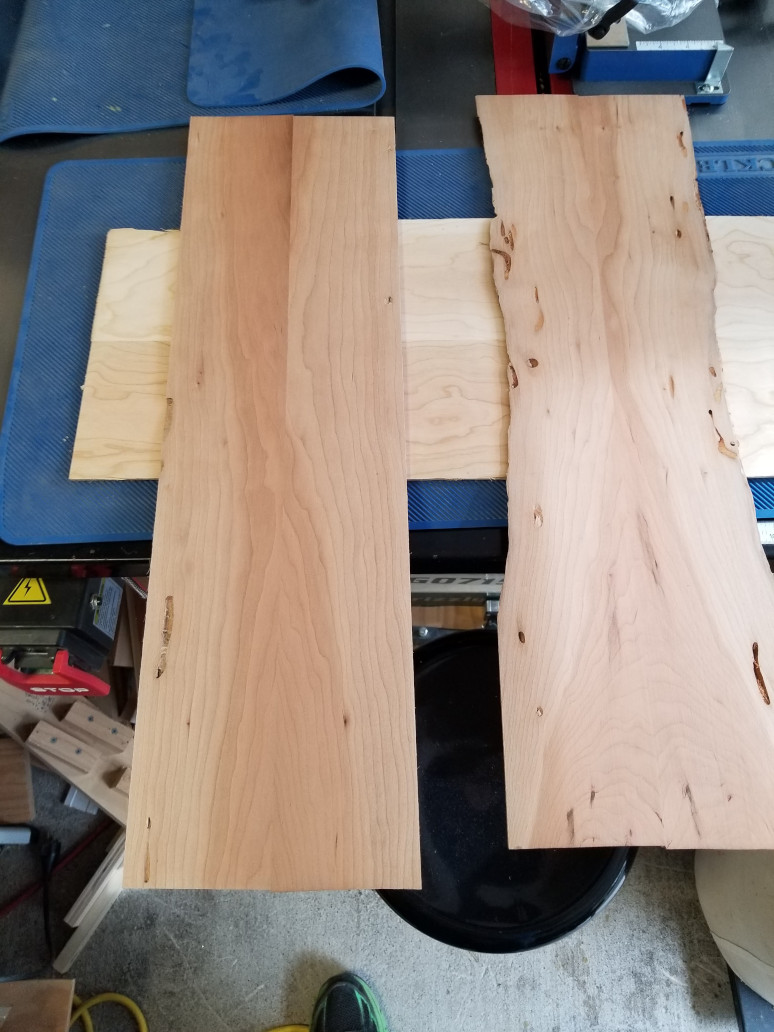
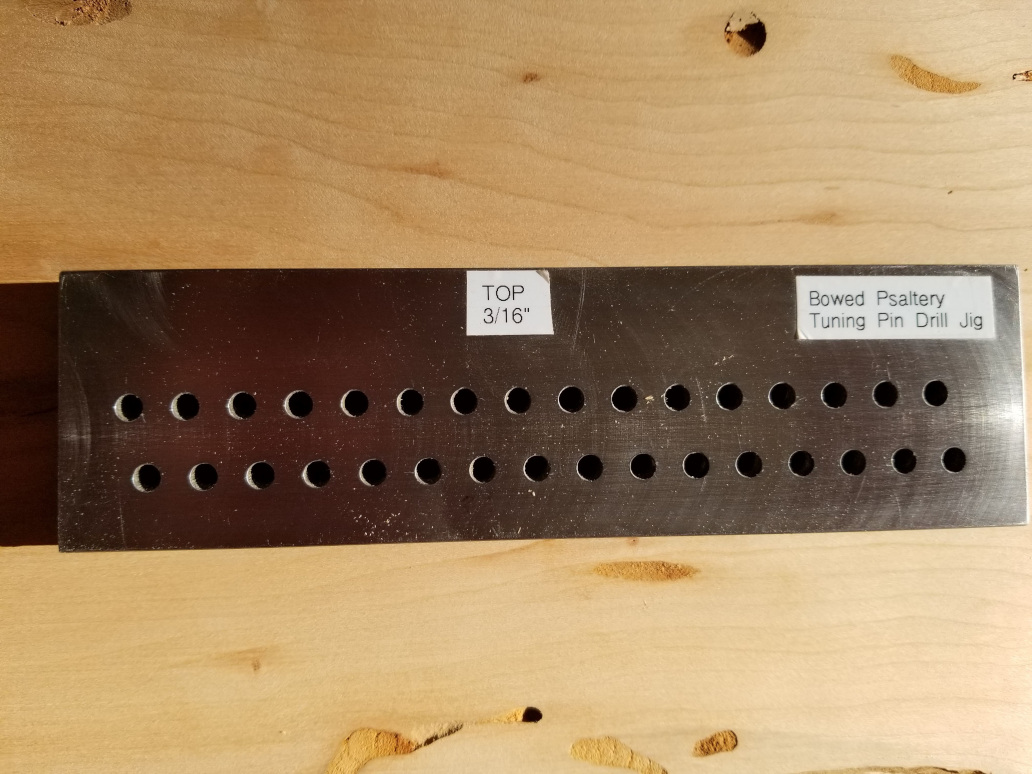
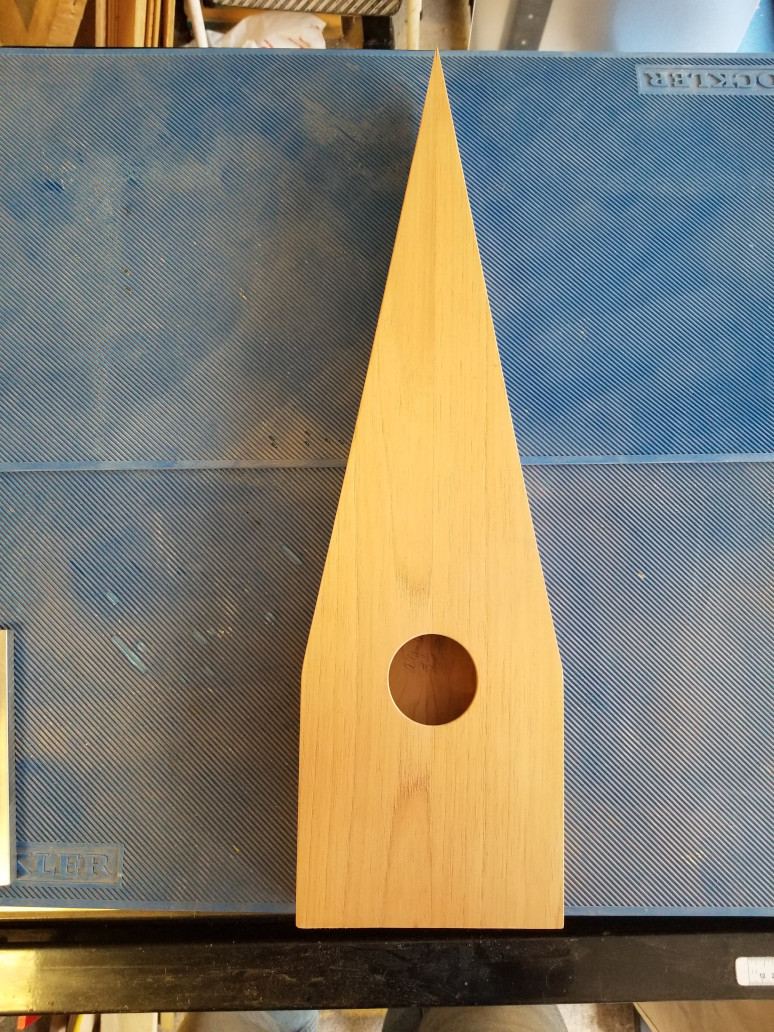
1.1.5.1 - Bowed Psaltery
01 bowed psaltery
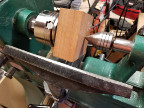
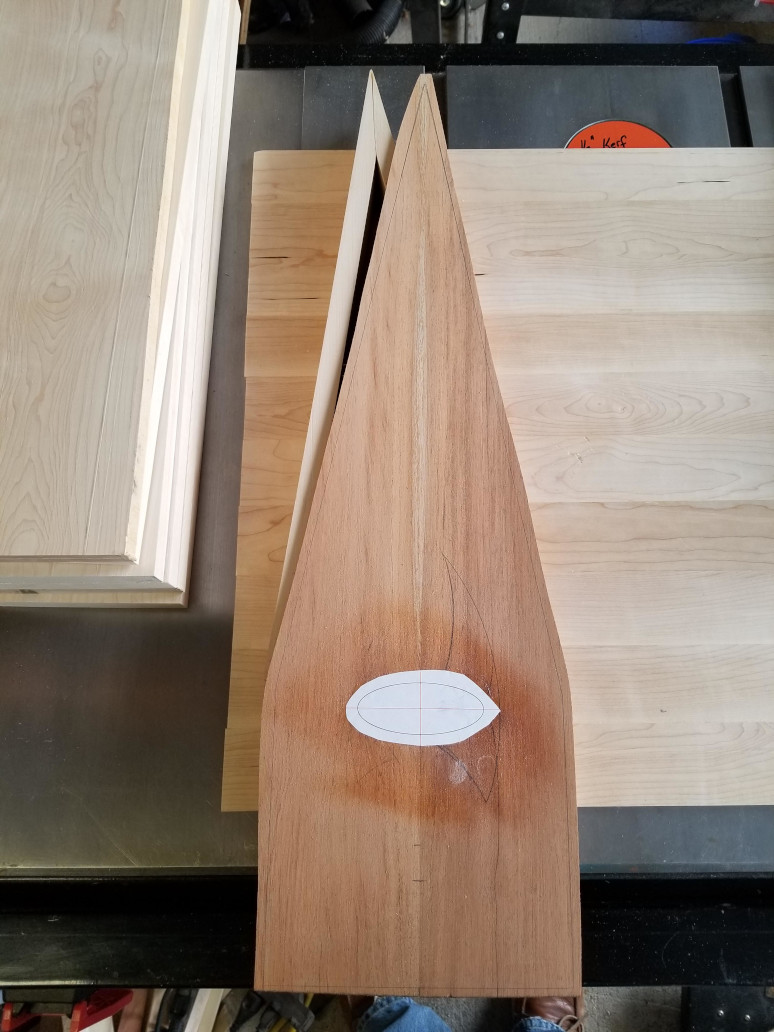
02 stock used for backs
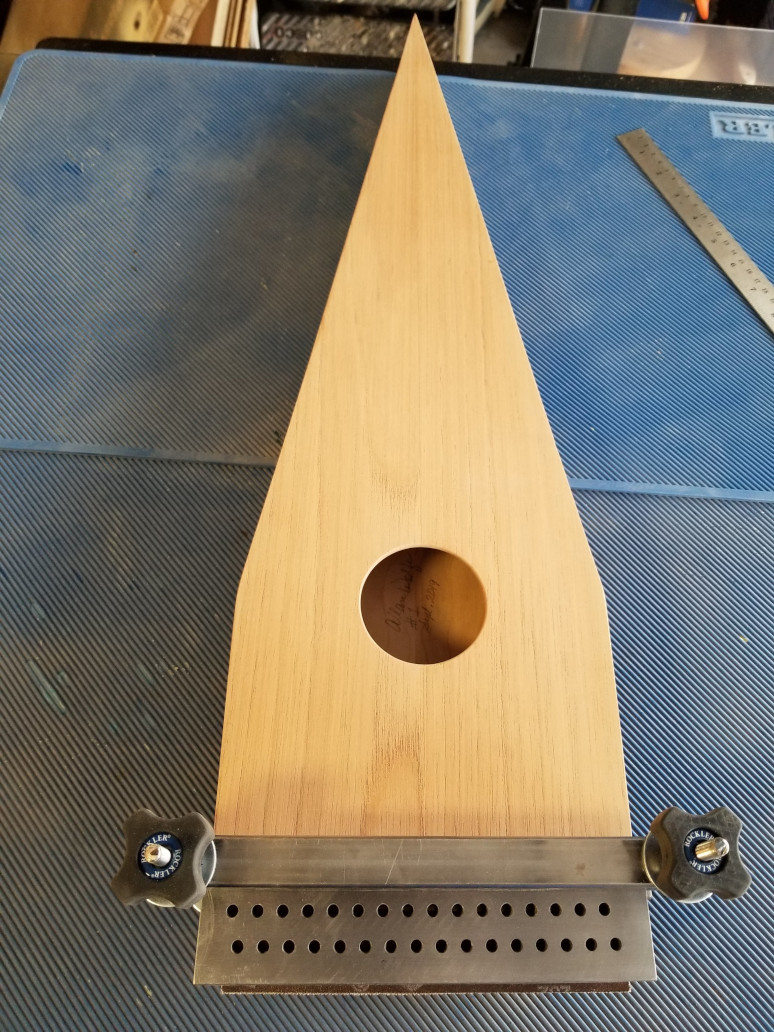
03 drilling jig for tuning pins
04 bowed psaltery sides frame
05 bowed psaltery soundboard glue up
06 soundboard glued
07 back glued
08 sound board glued
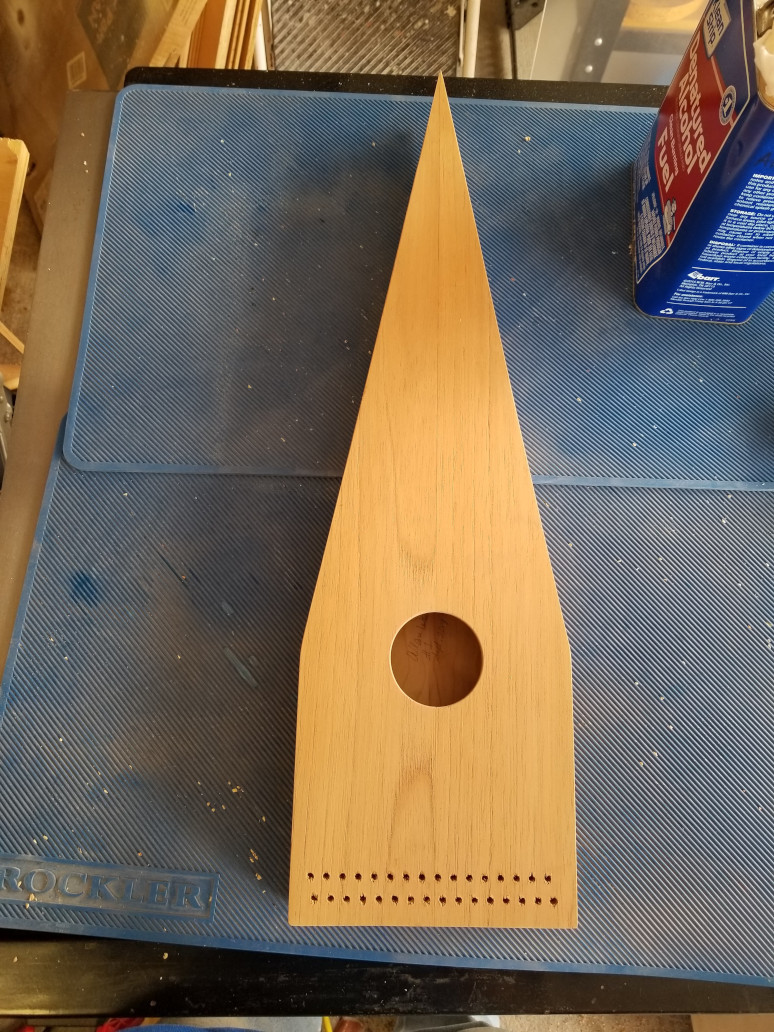
09 trimmed
10 ready to drill tuning pin holes
11 tuning pins holes completed
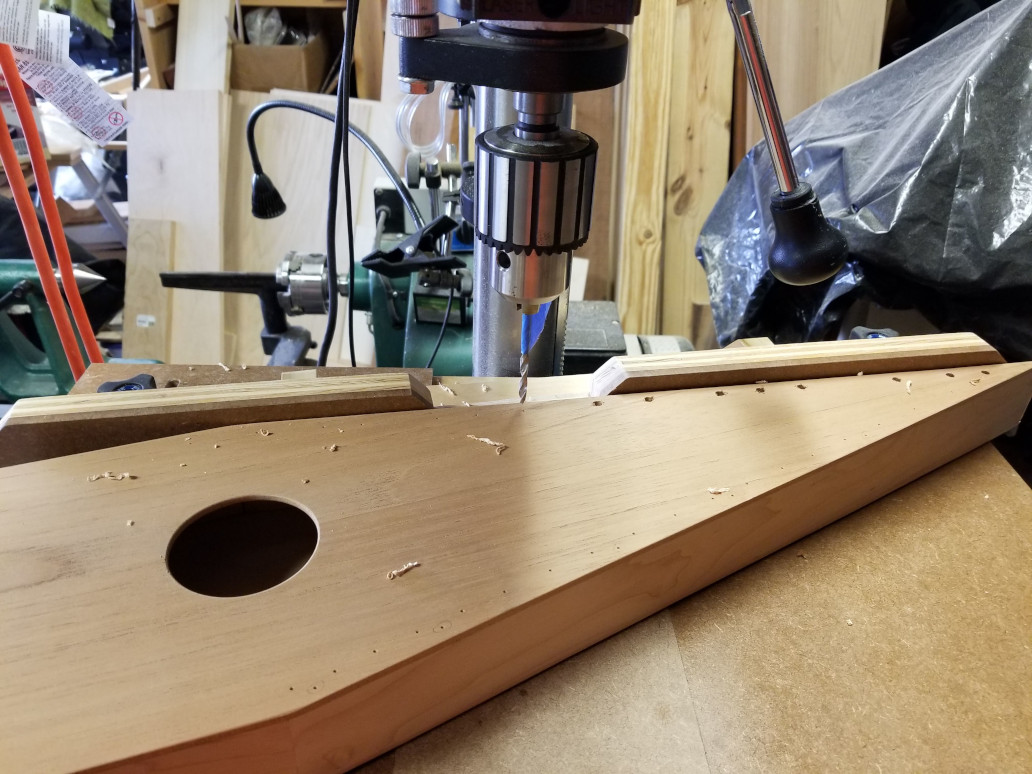
12 drilling tail pins
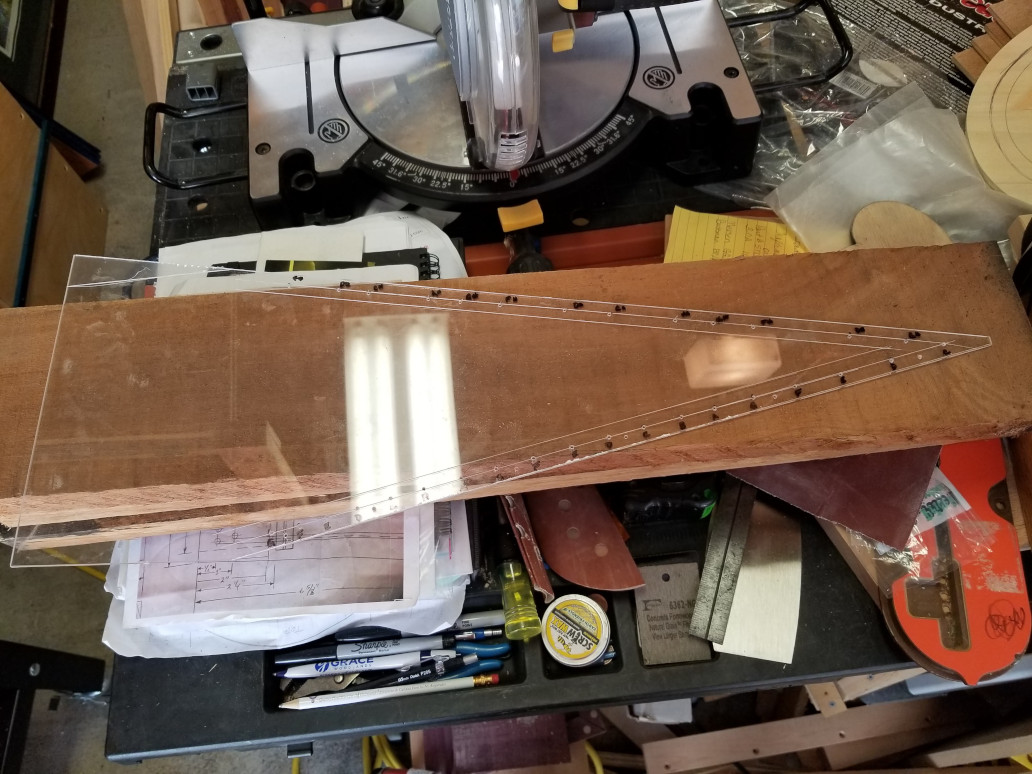
13 tail pin drilling template
14 prep for sound hole cut
15 sound hole cut
16 sound board glue up
17 finished bowed psaltery before wiring
18 finished bowed psaltery
Here is a sample of what the bowed psaltery sounds like. . .
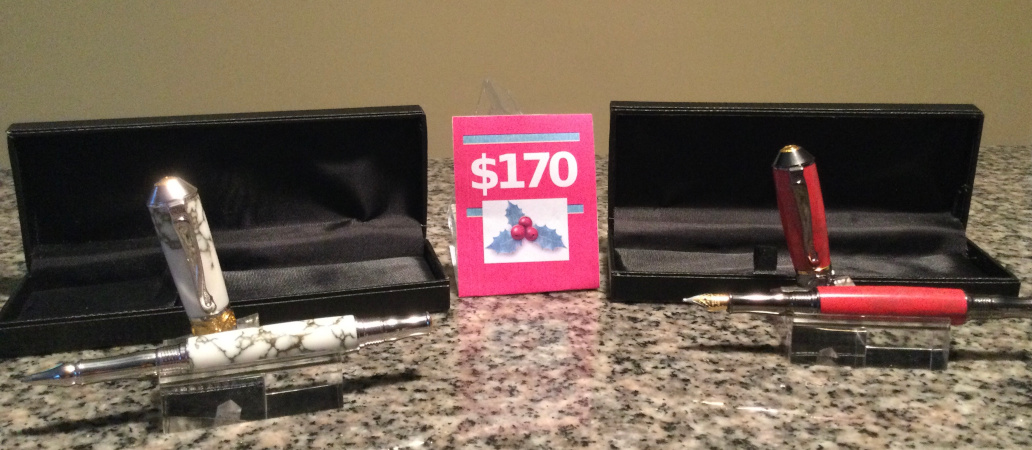
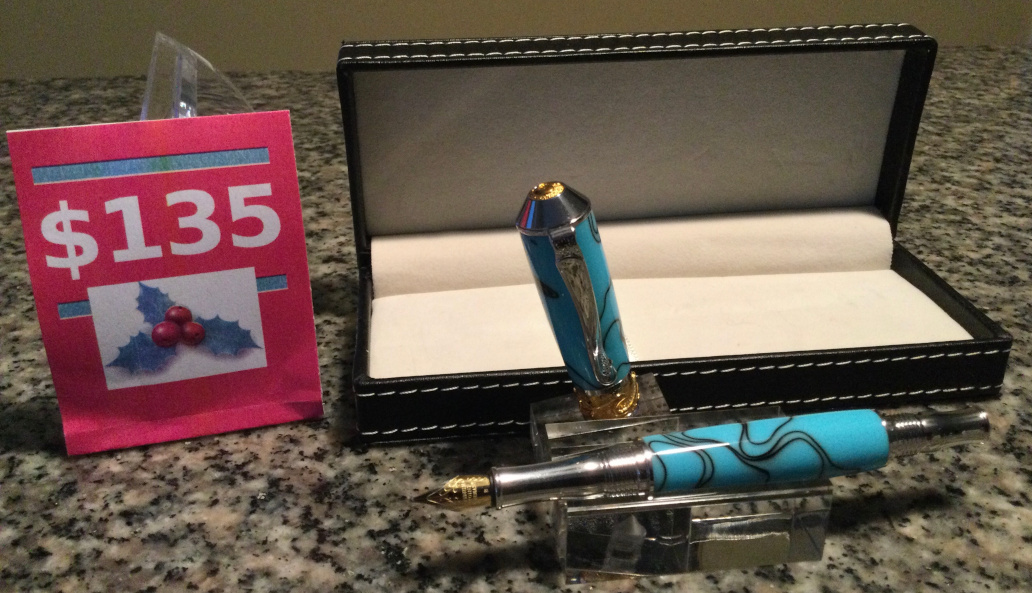
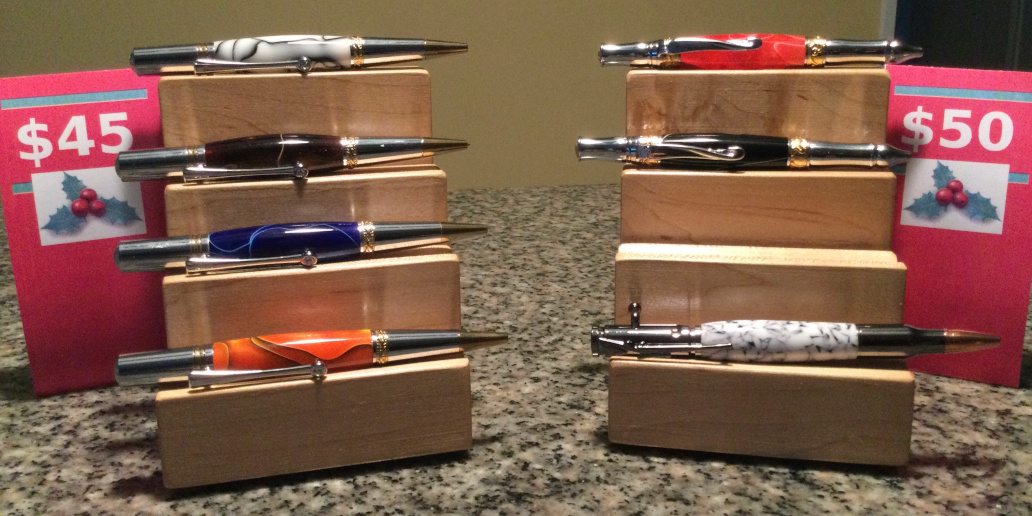
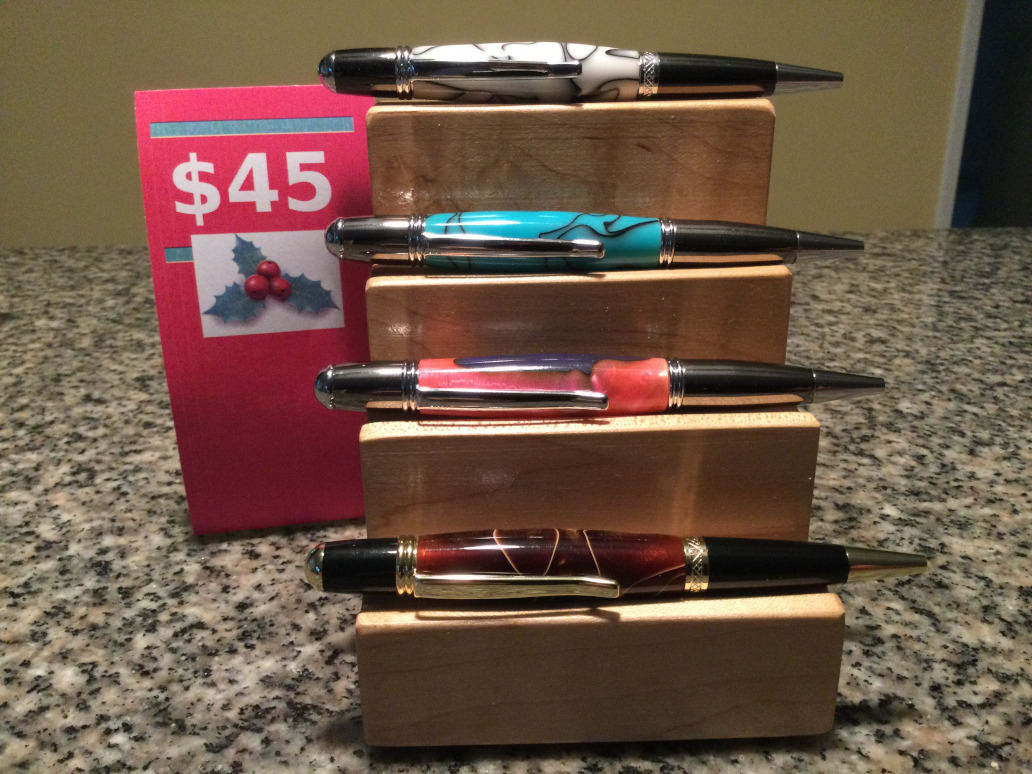
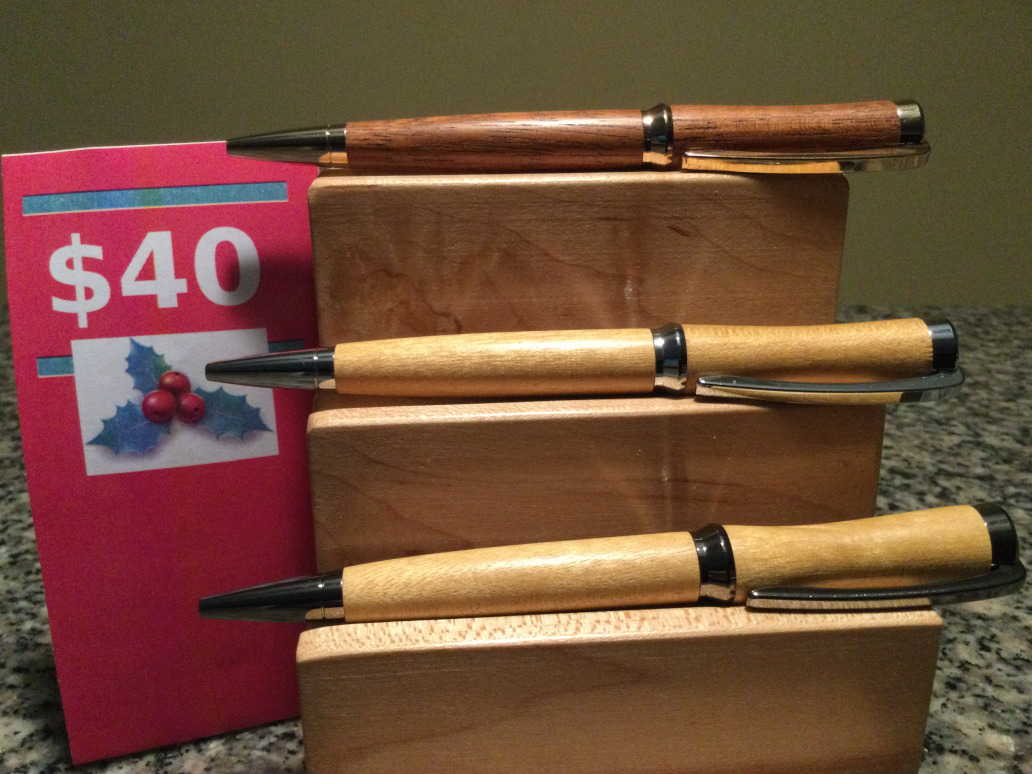
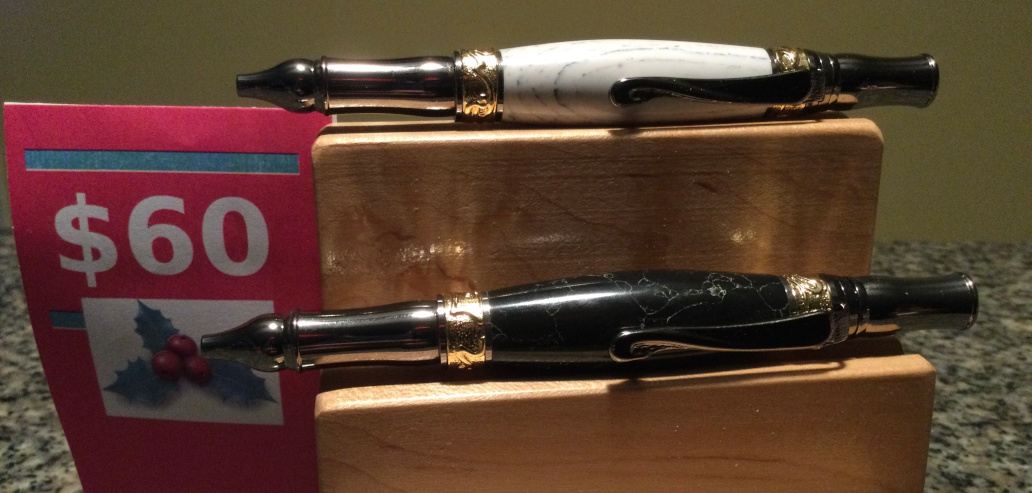
1.1.6 - Pens
01 broadwell nouveau sceptre
02 broadwell nouveau sceptre
03 majestic squire n noveau sceptre
04 gatsby
05 gatsby
06 gatsby
07 concava
08 noveau sceptre
1.2 - Woodworking Tutorials
Woodworkers enjoy sharing their knowledge and experience. I’m just an intermediate woodworker who enjoys the craft. Here is a list of tutorial papers I have prepared in the past to teach woodworking classes. You are welcomed to download and hopefully learn something from them.
These papers are copyrighted. Though free to use and share, please leave the copyright intact and give credit where credit is due.
This document is a procedure to help the beginning pen turner to acquaint themselves with the process for preparing, turning and finishing a pen using the Slimline pen kit.
Safety tools needed:
Safety glasses
Face shield
Dust mask
Tools needed:
Lathe
Drill press
Band saw
Round carbide tool
Square carbide tool
Pencil
Center finder
Awl
7mm brad point drill bit
Live center for tailstock
Barrel trimmer/end mill
Rockler pen press/drilling jig
Pen tube insertion tool
Materials needed:
Slimline pen kit
Wood blank 3/4” X 3/4” X 5”
Nitrile gloves
CA thin glue
Woodturners multi-roll sandpaper pack
#0000 steel wool
Paper towels
Friction sanding sealer
Friction polish
Safety information:
Always use both safety glasses and face shield when turning. You only have one face, one life. It isn’t worth loosing either should your work break while the motor is running.
This information sheet is only provided to help you get started. You are ultimately responsible for how you use your tools. We cannot be responsible for any accident you might have. If you are unsure of what you are doing, get help.
Procedure
Prepare pen blank for turning.
Open pen kit and remove brass tubes.
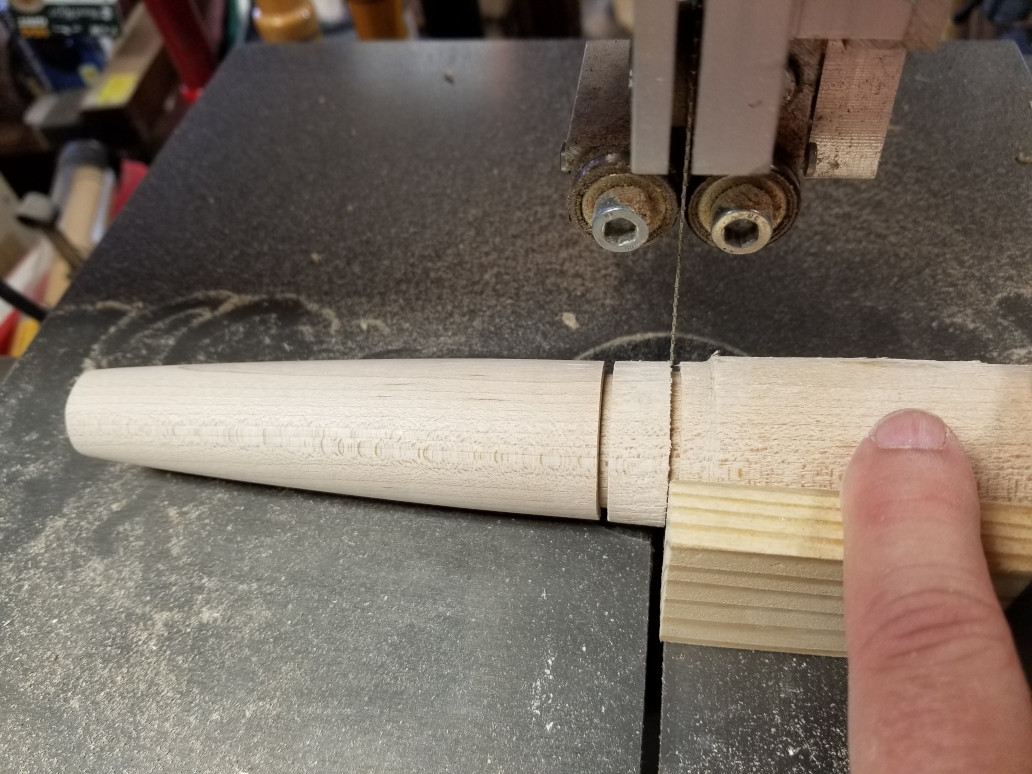
Using each brass tubes as a guide, mark for cuts on blank. Allow for about 1/8” on each side of the tube. This will be trimmed before turning.
Using the center guide mark from corner to opposite corner to find the center on the end of the pen blank. Use an awl to set a dimple to guide the drill bit into the center of the blank. Alternatively, you can use a straight edge to find the center.
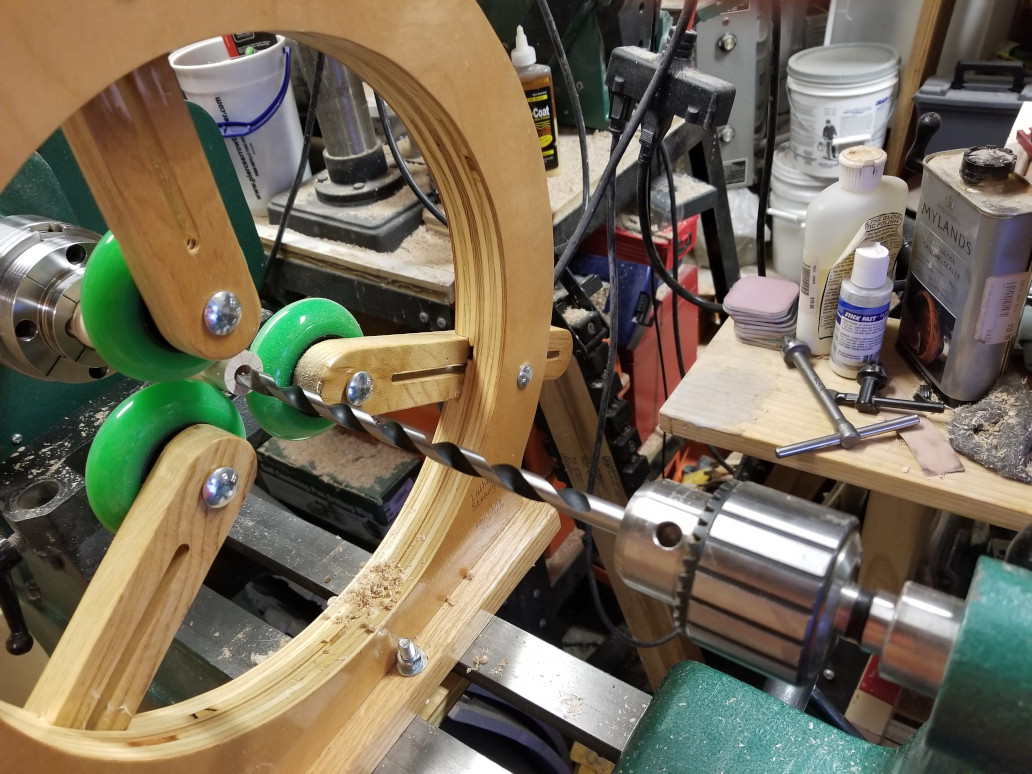
Drill hole through the pen blank allowing the brass tubes to move through the hole. Note that you need to burrow down about a 1/2” at a time, drawing the bit back out of the hole. This removes shavings and provides for a cleaner, consistent size hole.
Use coarse grit sandpaper and scuff outer side of tubes before gluing. This gives the glue a surface to hold on to.
With nitrile gloves on, apply CA glue down the tube, inserting the tube back and forth, as well as turning in the hole to spread the glue. It is preferable to use a medium CA glue as it sets too quick and works well to fill in gaps.
Allow glue to fully cure for 24 hours.
Using the barrel trimmer on the drill press with the blank in the Rockler pen jig to trim and square the ends. Trim down to the top of brass tube and no more.
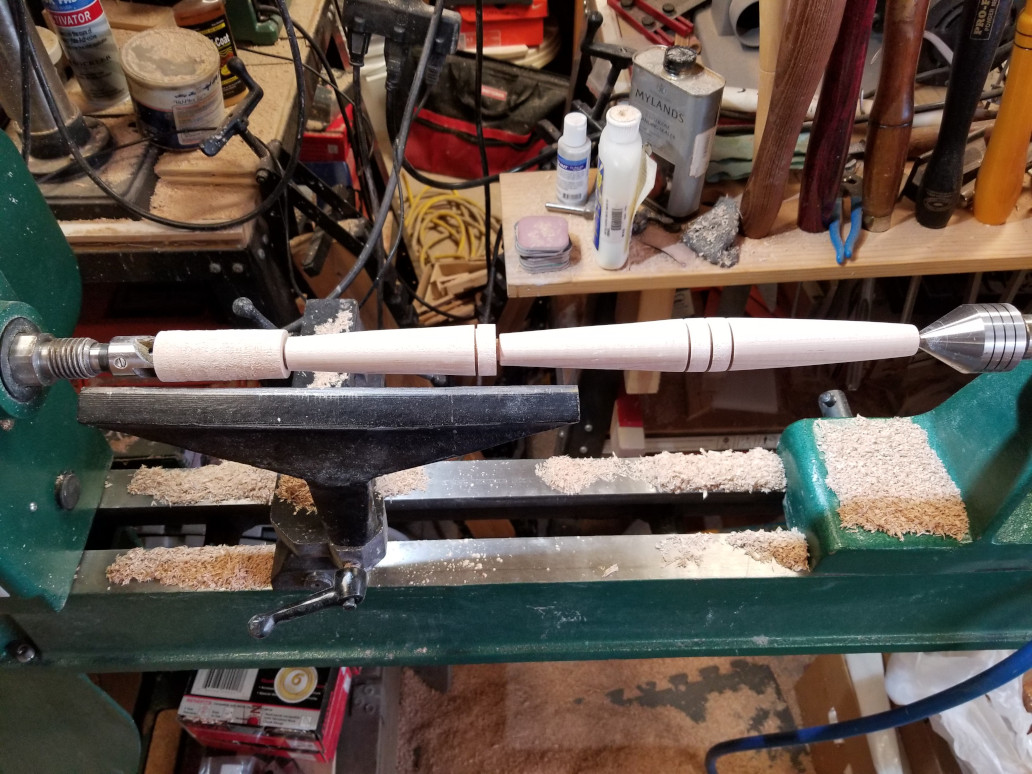
Mount pen blank on lathe.
Insert the pen mandrel into the headstock.
Remove the knurled nut from the end of the pen mandrel.
Slip on one bushing followed by the pen blank with tube glued in. Follow with another bushing, pen blank with tube glued in and lastly, the third bushing.
Tighten down the pen stack with the knurled nut.
Insert the live center in the tail stock. Torque the live center into the dimple at the end of the pen. Do not over tighten. If you do, you’ll warp the mandrel. The goal here is to steady the mandrel while turning.
Turn the pen body.
Bushings are designed to give you a guide for matching the diameter needed for the metal pieces from the kit to be assembled against your wood turning.
Tighten the tool rest so the corners of the wood blank will not hang on the tool rest when you turn on the lathe.
Start with the round turning tool to rough in a cylinder at about 1200 RPM. The carbide tool should be level on the tool rest. With your thumb on top of the tool on the tool rest and your hand firmly gripping the end of the handle, hold the handle up next to your body. Use your body as a lever to help move the tool and keep the tool steady on your work. Turn starting from the center move toward the end, whether the left end or right. This minimizes tear out on the ends. Stop the lathe periodically to see how you are doing.
After achieving a cylinder, start tapering your cylinder using the round tool down on the ends proud of the bushings (meaning, leaving the ends a bit thicker than the bushings). We are still roughing out the shape. To cut the taper, start close to the end and turn to the end, repeating a little further toward the center, drawing toward the end.
Switch to the square tool for finishing the shape. Your final cuts should be very light in order to simplify sanding.
Sanding and finish the pen body.
Sand starting with 150 grit to sand final shape at about 600 RPM or lower. It will take you longer on this grit than the others. Sneak up on the ends close to the bushing. On wood with heavy grain, it is good to sand from underneath and collect the dust on the sandpaper. This dust can be used in conjunction with the sanding sealer to help fill in the grain and provide for a smooth surface for finishing.
Using a paper towel, wipe on the sanding sealer while the blank is turning. If filling in the grain, allow it to become partially dry (~20 seconds). Using the collected dust, lightly place the sandpaper back on the blank so that the dust sticks to the sanding sealer. Allow to thoroughly dry before continuing sanding. Using the 150 grit, repeat sanding, sealing with collected dust a couple times.
Work up the grits. After the 320 grit, stop the lathe and sand with the grain. This will remove the cross grain sanding marks. Repeat this with each grit above.
After finishing sanding with the 600 grit, apply final sanding sealer coat, applying the sealer with a paper towel.
Use steel wool for lightly smoothing the final sanding sealer coat.
Using a paper towel, apply a few drops of friction polish evenly over pen body. With a dry spot on the paper towel, allow friction of the towel to polish. Repeat as needed until you reach the finish you desire.
Assemble the pen and test.
Follow the instructions from the kit. For the Slimline twist transmission, watch and don’t be too aggressive. Press the transmission in little by little, checking by twisting the transmission to the fully extended position, inserting the ink cartridge checking how far (or not) the ink cartridge has extended. This is critical. You do not want to extend too far. If you do, you’ll need to purchase a pen disassembly kit to push the transmission from the pen body and reassemble the kit.
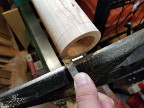
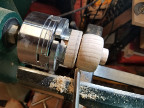
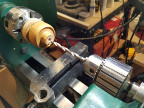
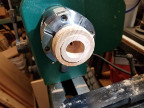
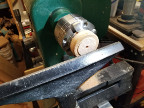
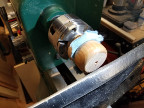
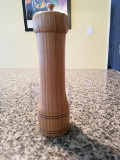
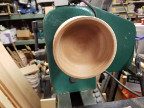
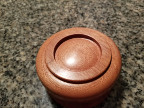
This paper documents the steps to turn a basic peppermill design on the wood lathe using the Rockler 8” peppermill kit (#50936). It will take 4 to 4-1/2 hours to build.
Safety
Safety is important in all aspects for woodworking, but particularly so with working on the wood lathe. Wood sometimes can be unstable, possibly not secured to the lathe properly, etc. Wearing the right type of safety equipment is imperative.
It is wise to use both safety glasses and a face shield. Protect your hearing with hearing protectors such as sound deadening headphones. Depending on the wood, a dust mask is needed. Remember you have one life, one face, one set of lungs. It only takes one accident to change or even terminate your life.
Tools
Here is a list of tools needed for turning your peppermill:
Spur center
Live center - conical
Chuck with jaws
1-5/8” Forstner bit
1-1/16” Forstner bit
3/4” Forstner bit
10” Forstner bit extender
7mm (5/16”) Bradpoint bit
Drill chuck in tail stock (aka Jacob’s Chuck)
Depth gauge
Outside calipers
(Optional) Wire burn tool (old guitar strings work well here too)
Parting tool
Roughing gouge or round carbide tool
Beading tool (Ellsworth style is a good choice or a Sorby Easy Beader) or diamond carbide tool
Scraper or square carbide tool
Fingernail spindle gouge
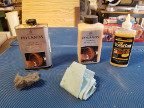
Supplies
Here is a list of supplies you will need for turning your simple bowl:
Wood – 3” X 3” X 10” billet, any specie, preferably a tight grained wood.
Various grits of sandpaper. A woodturner’s sand pack is good to have on hand.
Wood sealer suitable for woodturning.
Friction finish suitable for woodturning.
Paper towels for applying the sealer and finish.
0000 Steel wool for smoothing the wood sealer.
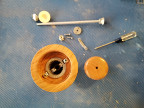
Rockler 8” Peppermill Kit (#50936)
Procedure
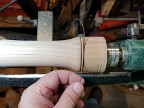
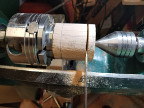
Cut 90o square blank 2-½” - 3” by 12” long. Mark for the centers by using a straight edge and pencil mark on both ends. Mark from one corner to the opposite corner. Follow by marking the adjacent corner to its opposite corner. You will see an “X” when done correctly. Punch a dimple at the center point. Using an awl, rest the side of the awl on top of the end with the point at the penciled crosshairs. Stand the awl up and with your palm, strike the awl until a definite dimple is made.
On the lathe we will start with a spur center in the headstock and the conical center in the tailstock. When using the spur center it is good to use a hammer and seat the spur on one end of the billet.
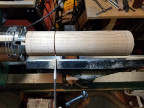
Mount the billet between the spur center on the headstock and the conical center on the tailstock. Position the tool rest according to the corner so that it clears the tool rest by about 3/8”.
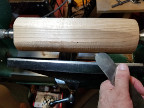
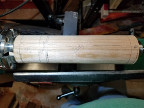
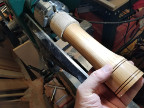
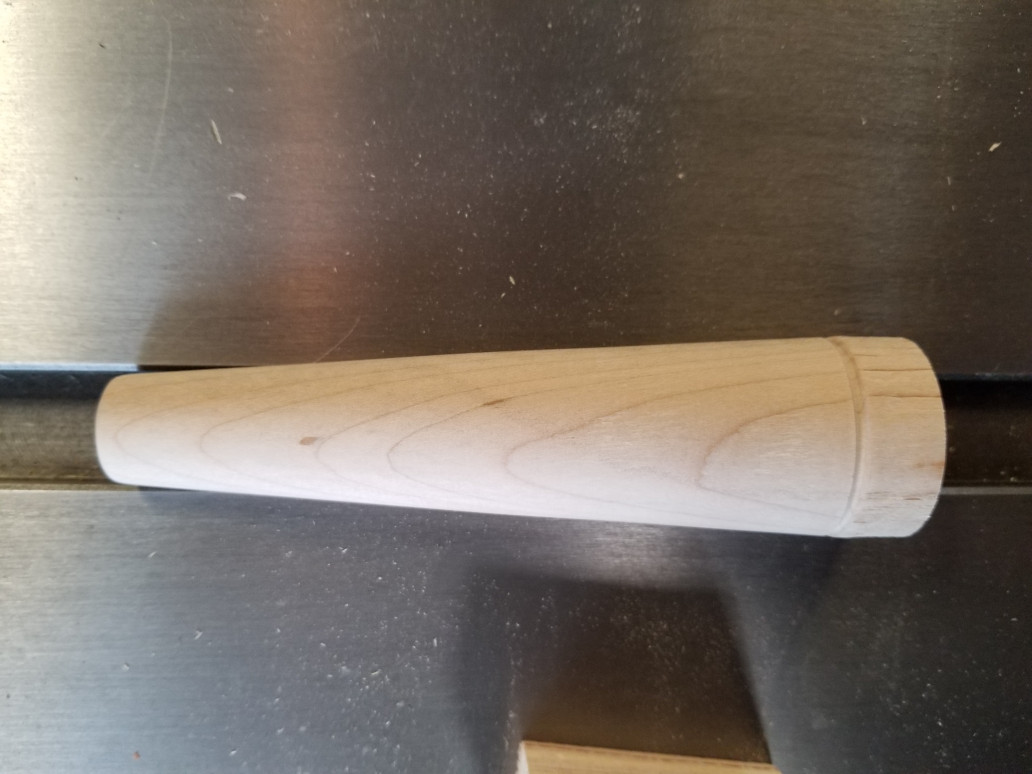
Rough to 2-1/2” round. Depending on the tools you have at hand, you can use a round carbide tool or a roughing gouge. You will likely need to reposition the tool rest as the billet rounds.
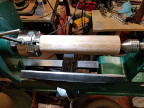
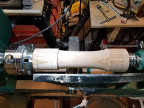
Square up the right end and cut a dove-tailed tenon on right side. This will later be turned around and mounted on a chuck.
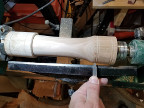
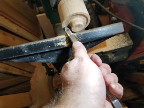
Remount tenon-side in the chuck/jaw Set up the Jacob’s chuck in tailstock to drill center hole. The left side will be the cap. The right side will be the bottom of the body. Mark off depth. From the right side, mark at 5/8”, 6-3/8” for the body, a gap the size of your parting tool (e.g. 1/8” for a 1/16” parting tool), 1/2” for the tenon of the cap and 2” for the cap.
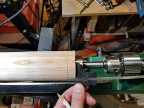
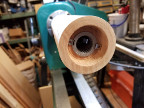
With a 1-5/8” forstner bit, drill to depth of 5/8”, checking with a depth gauge. We will later trim the bottom sto the final depth is 1/2”.
With a 1-1/16” forstner bit and 10” extender, continue to drill the second hole. You can begin drilling the hole without the extender until you run out of length. Use the depth gauge to test the depth to end at the end of the body.
Another method for estimating your depth is to use painter’s tape on the shaft of the extender. But insure accuracy using the depth gauge.
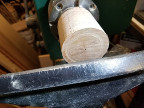
Reposition tool rest parallel to end. Square end (cleanup cut). Check depth to insure that it isn’t too shallow.
Create footing. Round in from the outside toward the center. This will help the peppermill to sit flat over time.
Test fit of hardware in the bottom of the peppermill. Trim out hole as needed to insure it will fit comfortably.
Remove hardware. Sand and smooth inside the foot.
Mount the conical live center in the tailstock. Butt the live center in the bottom of the body again to better support the piece.
Using the parting tool, partially part off between cap and body. This is just to better delineate the mark between the two pieces.
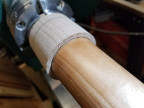
Set outside calipers to 2” (the minimum size the body can be without turning through into the inside hole).
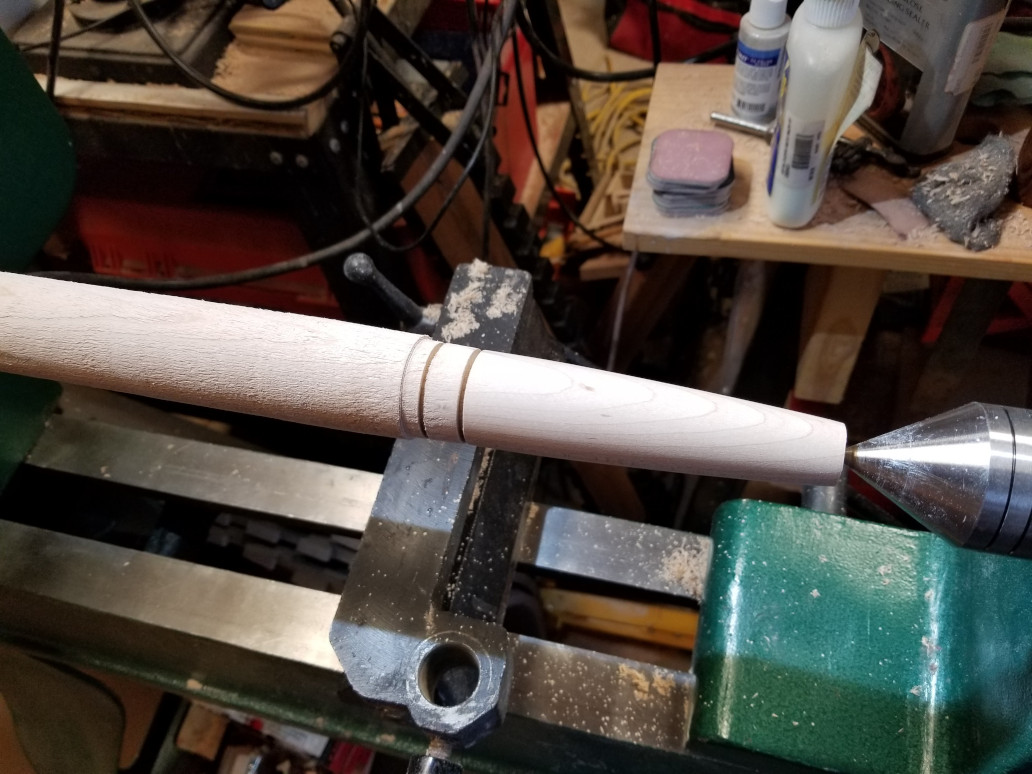
Create the final shape of the body. Start by squaring up (again) the bottom/right side. Shape the basic curve on the piece. Use calipers to prevent cutting too much off. Design should be a little thinner on top than bottom. The top will need to fit into a recess we will cut later in the cap.
Clean up with 150 grit.
Optionally, use the Easy Beader to create beads on bottom section. The diamond carbide tool can also be used. You can also use a wire burner to emphasize the beading.
Check the squareness of the footer again. Clean up the footer by making light cuts with the tool rest parallel with the body using the square carbide tool.
Sand up through the grits and lay final finish on the body.
Remove live center. Part off body section.
Clean up 1” hole on topside of the body with sandpaper if needed. Finish the topside by hand.
Square up bottom of cap section.
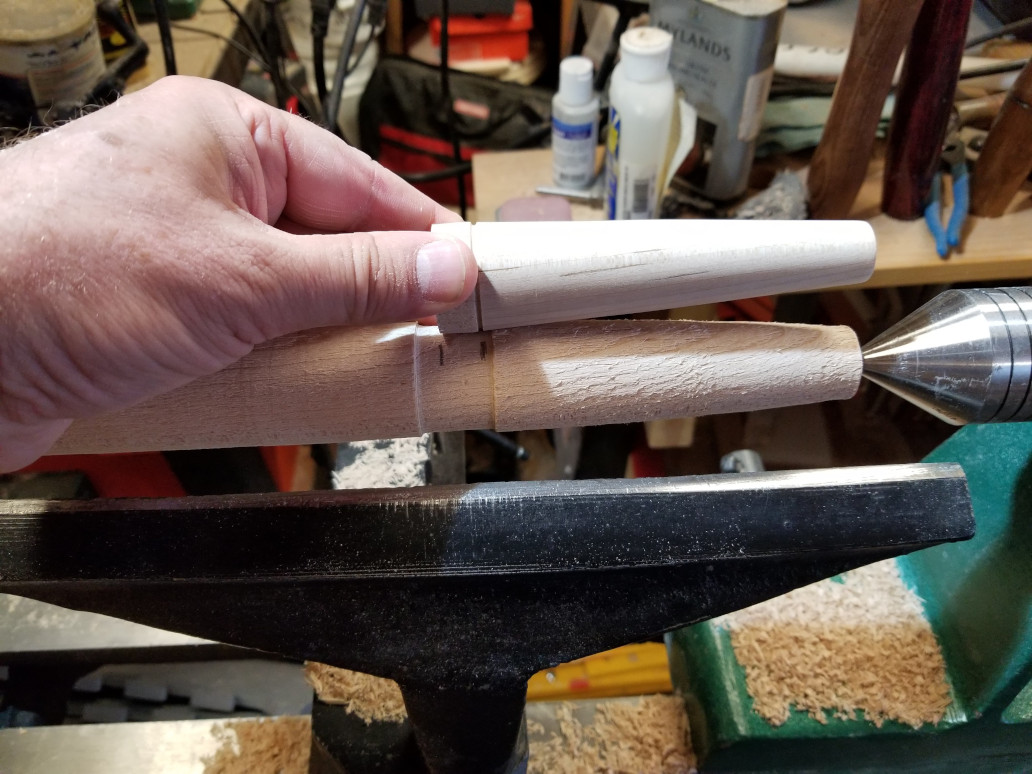
Create a 1/2” long tenon on the right side of the cap section. First turn a part down until 1” diameter. Finish cutting down the remainder of the tenon. Periodically test with the hole in the top of the body section. Fit should not be too loose or too tight.
While body section is mounted on the tenon, mark the width onto bottom of the cap section.
Cut mortise around tenon, leaving a broad footing. This allows the top section to fit over the body section and more gracefully cover the sharp top edge of the body. Square tenon end. There is hardware that will be screwed onto the bottom of the tenon itself.
Make partial part on the left side of the cap.
Shape the cap.
Sand up through the grits and finish the exposed portion of the cap.
Drill 7mm hole past the cap. The rod will reach from the bottom of the peppermill out through the top of the cap.
Finish bottom and side of cap. Part off.
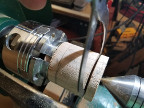
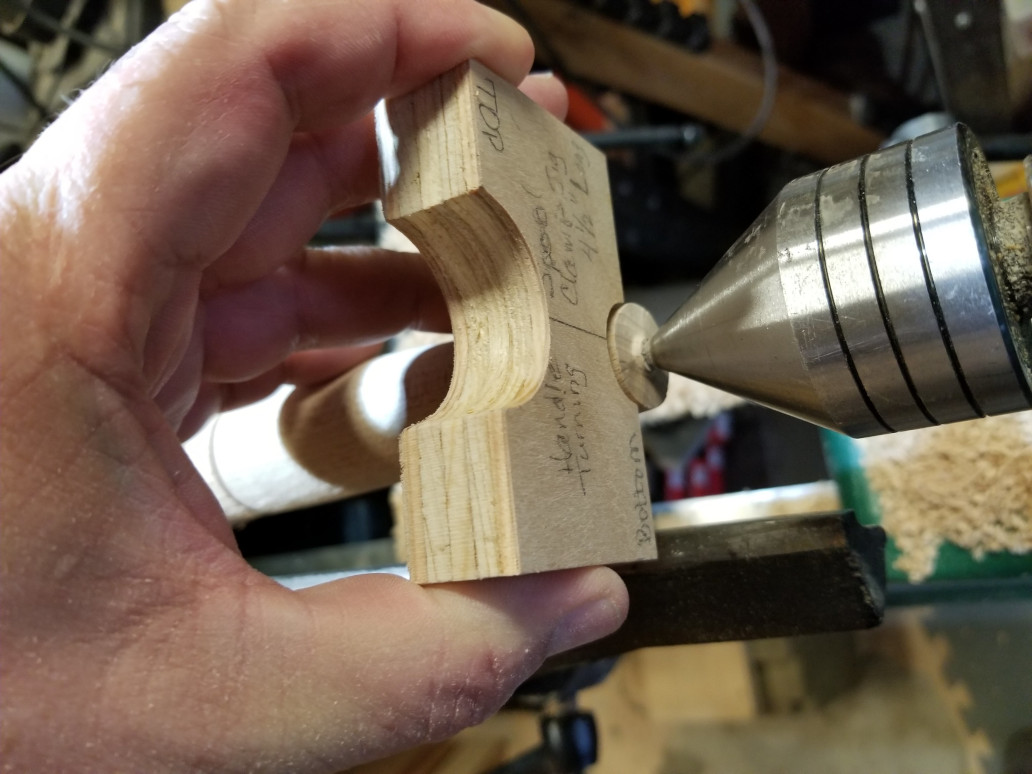
Create a jam chuck using scrap left in chuck. Square off end. Assist this process by using a 3/4” forstner bit and open a larger hole down a little more than the depth of the tenon on the cap. Open the mortise on the scrap so that the tenon on the cap fits snugly into jam chuck. You’ll likely need to use the fingernail spindle gouge to do this.
Use paper towel to wedge cap into jam chuck and mount conical live center onto the top side of cap.
Finish turning curve on top of cap. Flatten a spot where the hardware finial will sit. Sand and finish.
Sand through the grits and finish cap.
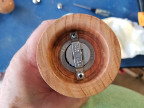
Assemble. Start by temporarily screwing in the lower guide with grinder in the bottom of the body.
Using the rod as a guide, mount the plate to cap.
Remove screws from bottom of body and put rod in with the dasher (the grinding disk) and screw retaining bar over the rod with dasher and grinder.
Put cap over the rod. Screw the finial onto the rod at the top of the cap. You should be able to adjust the grind of pepper by adjusting how tight the finial is screwed onto the rod.
This paper is intended to acquaint a newcomer to the world of CNCs. As a woodworker, the world of CNCs has its own unique techniques, vocabulary and process flow. This article, though not exhaustive, hopefully will introduce the reader to some of the basic aspects of the CNC system.
Where Do I Start
First off, we need to ask the simple question, what is a CNC machine? The CNC machine is a machine used for producing products through an automation system. This system includes a software stack that is used to design the product (such as a CAD program) and generate the codes for telling the CNC machine how to move (such as a CAM program). The CNC machine itself will have a controller that interprets those generated codes and produces the product. Some software programs such as Vcarve by Vectric are integrated so that you can design and create the CNC machine code in one interface.
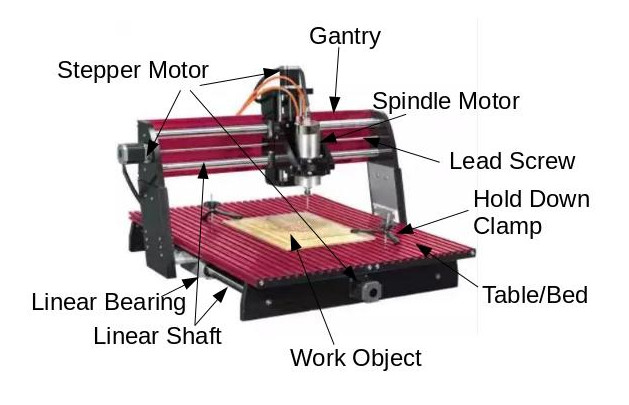
Mechanically, the CNC machine uses a series of step motors (a motor that can be controlled in a precise manner) that controls a cut, usually by a spindle motor such as a router that contains a cutting bit. This system uses the geometrical XYZ coordinate system for defining the movement of arms in a psuedo 3 dimensional manner. This system is the basis for other manufacturing systems such as laser engraving/cutting, 3D printing, 3D scanning. The XYZ movement is controlled by a set of code commands called G-Code.
CNC, at its heart, is more a process framework that has been an evolving system since its original development in the 1950s. The US Air Force established a CNC standard which was needed in being able to manage large scale projects between manufacturers. Over the decades, the CNC process framework and application in its evolutionary refinement has expanded covering new uses. One such new use case is the replacement for the need to stock parts in a warehouse, producing parts only at the time it is needed in a manufacturing or retail setting.
Below is a picture of a wood cutting CNC machine that will acquaint you with some of the basic parts. Pictured is a Next Wave Automation “CNC Shark”. Not pictured is the machine controller.
The Sky is the Limit?
Can the CNC system be used for all applications? Technically the answer is “yes” and “no”. Though the CNC system is a sophisticated solution that has a wide range of application, there are limitations to its capabilities. Here is a list of things to consider in using a CNC system as a work solution:
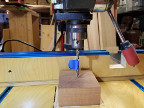
For simple applications or one time use, it might be quicker to do it manually. Most of the work is in the pre-production stage. Effort and time is needed to create the design, test and refine the G-Code instruction set that guides the CNC machine to perform its work. It is always wise to prototype production before producing your final product.
Production time might be too long. The more complicated a design is, the more time it will take to produce the product especially if that design requires cutter bit changes. Also to consider, if there are multiple copies of the product to be produced, it may take too much time and producing the product manually might be quicker.
When extreme accuracy is required, even if a simple application, it may make sense to have the CNC create your product.
True 3D products may not be possible. Depending on the type of CNC machine you have, doing complicated work such as true 3D work may not physically be possible since the machine was not designed to function in a true 3D manner. For example, if the spindle motor can only vertically and a horizontal cut is required, the machine physically is unable to make the required horizontal cut. Most machines are capable for “2.5D” projects. This means that a psuedo 3D image can be attained in a relief form on a single surface.
Bed size of the CNC machine dictates how large your project can be. For oversized projects, the width is fixed. It could be possible to cut extended widths by breaking up the project into two parts and re-position the project between parts. This can be very difficult.
Overview of the Process
Consider this workflow:
First, you have to have an idea. What is it you wish to produce? For simple projects and depending on the design software you are using, you can start with a JPEG picture of the object you wish to produce. There are also forums and stores on the internet where you can purchase and/or download a file ready to use.
It is necessary to create what is called a vector graphic formatted picture. This is ultimately what is used by the software to figure out how to define the XYZ paths for the cutter bit to follow. Decisions are made here as to what cutter will be used and how deep the cutter will travel. Sometimes multiple passes are needed with cutter (aka tool) changes needed. Expertise here comes as you develop your skill in working with the software in conjunction with the CNC machine.
Most CNC software will have a feature that will allow you to visualize the path of the cuts as well as the direction the spindle motor will travel before dropping the cutter onto the surface of your object. Better software even has a feature that animates how the spindle motor will travel to better visualize the operation in production. This step is a point for review to see roughly what your object will look like in terms of how the CNC machine sees it. This may require going back to your design and tweaking the design in a way that will accommodate how the object will be cut when you go to production.
When the design is complete, G-Code is created and saved as a file to either a USB thumb drive or a micro SD chip depending on the manufacturer of the CNC machine. The file is then connected to the CNC machine and executed there.
It is important to prototype. Using cheap or scrap material is important to try out the G-Code that the software had produced. Logically, you could potentially waste expensive or irreplaceable material if you go straight to final production. After reviewing your prototype, you may need to go back to design and perform any needed tweaks.
Lastly, is the final production step. Being confident that your prototype produced the desired result, you are ready for producing the final product.
Some considerations to consider in design:
Can I perform this in one pass with one cutting bit or will it take multiple passes with a “tool change”?
Can I create multiple products out of one sheet of material in one pass?
Where will my XY data (0, 0) coordinate be established (e.g. in the center, left front corner, etc.)? Where will my Z data coordinate fall (e.g. material surface or the CNC bed)?
How deep should the cuts be?
If the cut is intended to go completely through the material, it may need to have ???? left behind for manual cutoff. You don’t want the piece to take flight when the CNC makes the final cut.
How fast should the cutter go? Roughly, the deeper and broader the cut is, the slower the speed. The harder the material also factors in.
Conclusion
The CNC system has transformed manufacturing on a large scale. It’s evolution has provided a quality solution that can be used on a small and hobby scale. While there is a learning curve, it can be a rewarding hobby or provide a low cost solution for a small business.
This paper documents the steps to turn a basic, simple bowl on the wood lathe.
Safety
Safety is important in all aspects for woodworking, but particularly so with working on the wood lathe. Wood sometimes can be unstable, possibly not secured to the lathe properly, etc. Wearing the right type of safety equipment is imperative.
It is wise to use both safety glasses and a face shield. Protect your hearing with hearing protectors such as sound deadening headphones. Depending on the wood, a dust mask is needed. Remember you have one life, one face, one set of lungs. It only takes one accident to change or even terminate your life.
Tools
Here is a list of tools needed for turning your simple bowl:
Ruler.
Pencil.
Awl.
Chuck with expandable jaws and wormscrew. These will be used to hold the stock in the headstock of the lathe. If you have a “reversible” lathe (meaning the motor runs either direction), you will need a chuck that is reverse compatible.
Turning tools – carbide tools are the best for the beginner. They are straightforward, simple to master and does not require sharpening. For this bowl, we will use the round tip for roughing out, the square tip for squaring and some finishing and the diamond tip for creating a “dovetail mortise” in the bowl bottom so that the chuck jaws can hold onto it.
Live center. A conical one is best as it allows the greatest area around the center to be worked.
Divider or compass.
Depth gauge (optional).
Bradpoint drill bit – 19/64” (8mm) for drilling the pilot hole on your wood blank to be mounted on the wormscrew.
Supplies
Here is a list of supplies you will need for turning your simple bowl:
Wood – 4” X 4” X 2”, any specie.
Various grits of sandpaper. A woodturner’s sandpack is good to have.
Wood sealer suitable for woodturning.
Friction finish suitable for woodturning.
Paper towels for applying the sealer and finish.
Steel wool.
Procedure
From corner to opposite corner, strike a line. Do the same on the adjacent corner. This “X” mark will give you the center point of your wood. Sometimes your wood blank may not be perfectly square and your center will not be perfect. This is fine since we will be rounding the stock down and it will be round according to the center that is marked.
In this tutorial, we are using the Nova G3 chuck. The wormscrew on this make of chuck technically needs an 8mm bradpoint bit. A 19/64” bit works fine for medium density hard woods. Softer woods will need a smaller size, harder woods will need a larger bit.
Use painter’s tape and mark off for a ¾” deep hole. We do this in order to drill a pilot hole in the wood so that we can fully mount the wood blank to the wormscrew and not drill into what will be the base of our bowl.
Preferably, use a drill press to drill the pilot hole into the wood blank, not drilling deeper that what is marked by the painter’s tape. It is important that the hole is straight. This will allow us to more easily round the woods blank and utilize all the surface of the wood as is possible.
TIP: Be sure to drill ¼ – ½” at a time, backing out the bit so that the waste sawdust can surface. It you don’t, your hole size could be affected not to mention shorten the life of your drill bit due to friction heat.
With your chuck in place on the headstock, tighten the set screw (if a reversible chuck on a reversible capable lathe). Tighten the wormscrew in the chuck in a way that it makes the most contact within the jaws.
With the stop lock engaged on the lathe, if it has it or use the chuck key in the chuck to hold the chuck stationary, screw the wood blank onto the wormscrew. IMPORTANT: the wood blank must be screwed down securely against the jaw set – this is for your safety
Using the divider or compass, measure a radius of 1” and draw a circle out from the dimple in the center of the wood blank. This will be where we later cut the “dovetail mortise” to be used by the chuck to hold the blank from the bowl’s bottom and finished footing.
In the tailstock, insert the conical live center and position the tailstock up to the wood blank. Tighten the tailstock so that it is securely supporting the wood blank from the right side. This is an extra safety precaution to keep the wood stable, especially while performing the initial rough cuts.
Move the tool rest into place, square in front of the wood blank. Test the most narrow gap to be about 3/8”. It is important that the corners of the blank do not hit the tool rest.
**IMPORTANT:** Always have the lathe powered off while adjusting the tailstock, headstock, or tool rest. Not doing so, may mean your fingers get pulled into lathe unexpectedly.
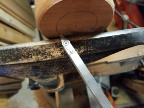
Round the blank into a round cylinder. Using the round tip tool on a medium speed, start near the left side of the blank and take light cuts. Turn towards the end. Do not start on the end and cut away from the end. Doing so, may produce tear-out.
Remember that you are turning a square object into a round one. You will start out turning more air than wood. As you round the blank, you will be cutting more wood and can take more aggressive cuts.
Work from the middle to the right end. Do not start on the right end and work toward the center for the same reason stated above, for the same reason.
Work to even the cut across the blank, alternating this step until a round surface has been rough cut. It is good to turn off the lathe periodically to check your work.
TIP: It is natural to keep your eyes on the tool over the tool rest. However, if you glance at the top periodically, you can better see how much “air gap” you have left or inspect the profile of your turning.
We now cut the “dovetail mortise”. Stop the lathe, back the tailstock off and reposition the tool rest so it is parallel with the end of the blank.
Using the diamond tip tool, angle your first cut at the circle drawn on the end.
After an initial cut, you’ll need to work further from the inside of the circle toward the circle in order to clear material that inhibits your diamond tool from making that angled (aka dovetail) cut.
Using the square tool, start to square up the footing of the bowl.
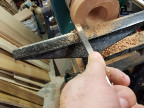
Using the round tool, start carving out the bottom of the bowl. Be sure to move the tool from the center outward, not the other way around.
Ideally, we are striving to have a curve that has the visual appearance to be continual from the bottom of the bowl to the upward curve on the side of the bowl. Supplement with using the square tool for smoothing.
Shape the outer edge of the bowl. By now, you should have developed a feel for how the turning tools work. Use the tool you feel comfortable with to shape this outer edge.
Do not cut the entire foot off! Remember that our bowl bottom serves two purposes: (1) provide a hold when we go to hollow out the inside and (2) provide a stable finished foot that won’t affect the bowl’s “flatness” after it is finished. Wood breathes and can change shape over time. Having a smaller surface for a footer helps to maintain a flat surface over time in a way that the bowl won’t rock.
Stop the lathe and remove the tool rest. On a low speed, beginning with 150 grit sandpaper, start rough sanding. Notice that the side of the bowl is a combination of straight and end grain. The two sand differently, possibly with different results.
Work from the 150 grit to 600 grit. Most of your sanding will done using the rougher grits. The higher grits, just refine the smoothness while the rougher grits do more for shaping and shortening the wood fibers that would ordinarily stand up, if the wood was dampened which would affect the final finish.
Using the round tool, start carving out the bottom of the bowl. Be sure to move the tool from the center outward, not the other way around.
***TIP:*** If you are working with a coarse grain wood and desire to fill in the coarse grain before final finish, sand the bowl from the bottom, retaining the sanding dust on the sand paper. Set the sandpaper aside with the sanding dust retained. Apply the alcohol based sanding sealer (see below) and reapply the retained sanding dust about half way before the sealer dries. Do this 3-4 times with the 150 and 240 grits or as needed to completely fill in the grain.
You are now ready to “finish” the bottom of the bowl. With this technique, we will not have to re-mount the bowl a second time to apply the finish to the bottom.
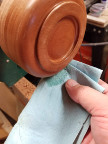
Apply the sanding sealer. With the lathe running on a low speed, use a paper towel and put a small amount of the sealer on the bowl. Wait for the alcohol to evaporate and use the steel wool to sand down the sealer.
This can be done multiple times depending on how porous the wood is. It helps to wait 10 minutes if the wood is acting like a sponge.
Your work should look more smooth and shiny.
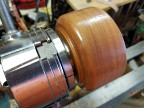
Apply the friction polish to the bottom of the bowl. Using the same technique as the sealer, apply the friction polish. The friction polish will build up to produce the gloss you desire.
With the lathe stopped, unscrew the bowl. Remove the wormscrew. Tighten (expand) the chuck jaws so that you can mount the bowl bottom using the “dovetail mortise” you have just finished.
Position the tool rest parallel to the bowl side. True up the side again and create the final outside shape. It is normal for the bowl to be a little out of kilter.
Stop the lathe. Measure and set your depth gauge. This is done by sight.
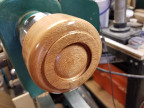
Position the tool rest parallel to the bowl top. Using the round tool, start carving out the center of the bowl. Begin on the left side of the old pilot hole and work toward the left, taking small cuts. For now, we are just “hogging out” the center. This is where the most material will be taken out.
Square the outer edge for where the bowl top will be using the square tool.
Start turning the side wall cut using the diamond tool. Work back and forth between opening and thinning the bowl bottom and turning the side. Be sure to thin the top side of the bowl before the bottom of the side. You want to keep as much support as possible on your piece while you are turning.
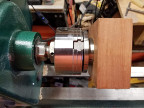
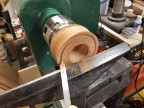
Let’s take a moment to discuss physics on completing the inside of the bowl. Wood has natural strength but becomes weaker the thinner the wood is worked. Also wood is weaker to work end grain than long grain. As we hog out the inside, in order to maintain the most strength in the wood, we leave the bottom of the walls thicker than the top. As we reach the thickness at the top of the bowl, we work down the wall thinning the wood gradually. The picture on the right shows this technique.
Using the depth gauge, set the depth for how deep we will carve out the interior of the bowl. Use this periodically to check how much further we need to cut.
As with the bowl bottom, finish the exterior and interior of the bowl as the bowl. There is no need to finish the bottom that is in the chuck since it was already completed.
2 - Soap Making
No one knows how or where soap making had originated. There are recipes that date back 5000 years with variations appearing in Mesopotamia, Egypt, ancient Greece and Rome. Modern commercially prodoced soaps are really detergents in bar form. Once you have experienced handmade soap from natural plant sources, you never desire to go to the store to buy another bar.
Introduction
For a number of years, my daughter and I would sneak off to a nearby bath shop that sold handmade soaps and bath salts. The quality of soap was so much better than the detergent based name-brand soaps from the grocery store.
After retiring, taking my periodic trip to the bath shop, my wife was not pleased that if I wanted to buy “that expensive soap” I would have to learn to make it. Little did she know I was more than happy to research and add yet another hobby to my arsenal!
In my teens, I was befriended by an older lady who lived a few doors down from my grandmother. I enjoyed hearing her stories when she was young and raising her own family. One of the stories she shared was over how they made their own soap in a wash tub over a fire in their backyard using lye and their collected cooking grease. Even then that intriqued me how taking a really caustic chemical combined with old grease could make such a useful product.
When I went to research how soap was being made today, I was taken back that animal fat was no longer used, but a whole list of a variety vegetable oils were being used. Though my first batch was not the greatest, I have since learned the technique and have made some really nice soaps. This section contains articles and some recipes I’ve used to make soap.
2.1 - Soap Making Articles and Tutorials
2.1.1 - Modern Soap Making
This was a presentation I made to a senior citizen’s group in November 2017.
Stir with a wooden paddle the water and lye in an enameled wash pan until dissolved. Let cool until it’s warm so that you can hold the pan in your hands.
In a separate bowl:
1/2 cup Borax
1/2 cup Sugar
1 cup Ammonia
Stir separate then stir into lye water. Strain 1/2 gallon of used grease and mix into mixture. Stir (whipping) until thick.
NOTE You can add perfume, etc. to the mixture.
Wait until the next morning and cut into bars.
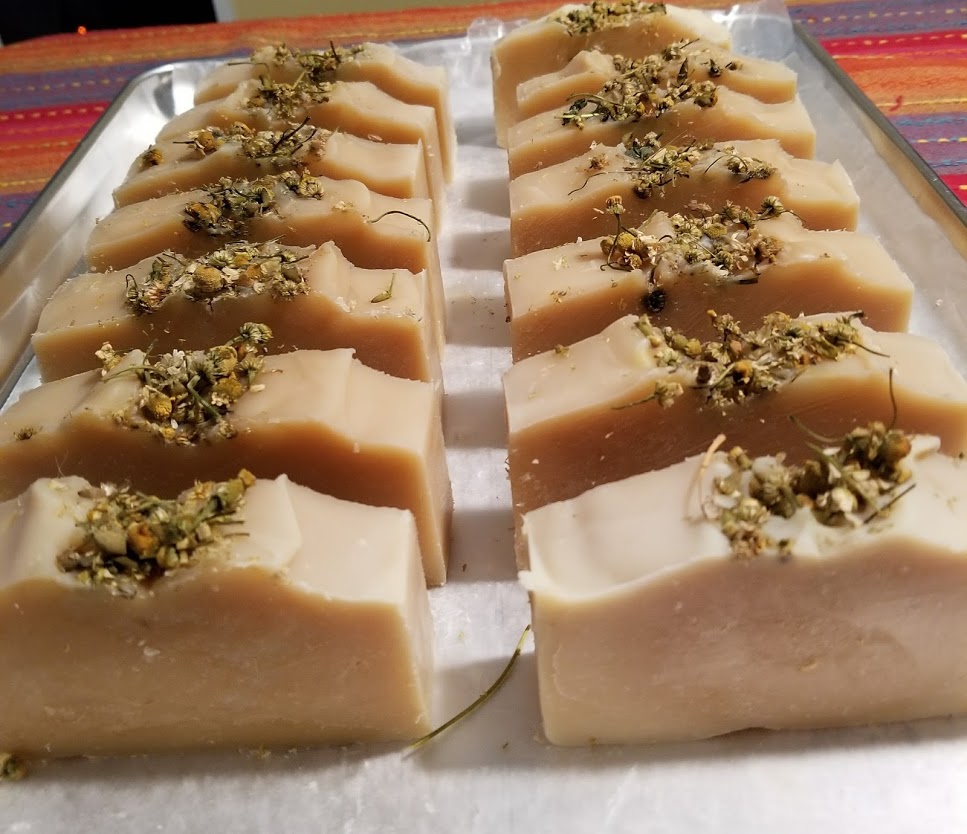
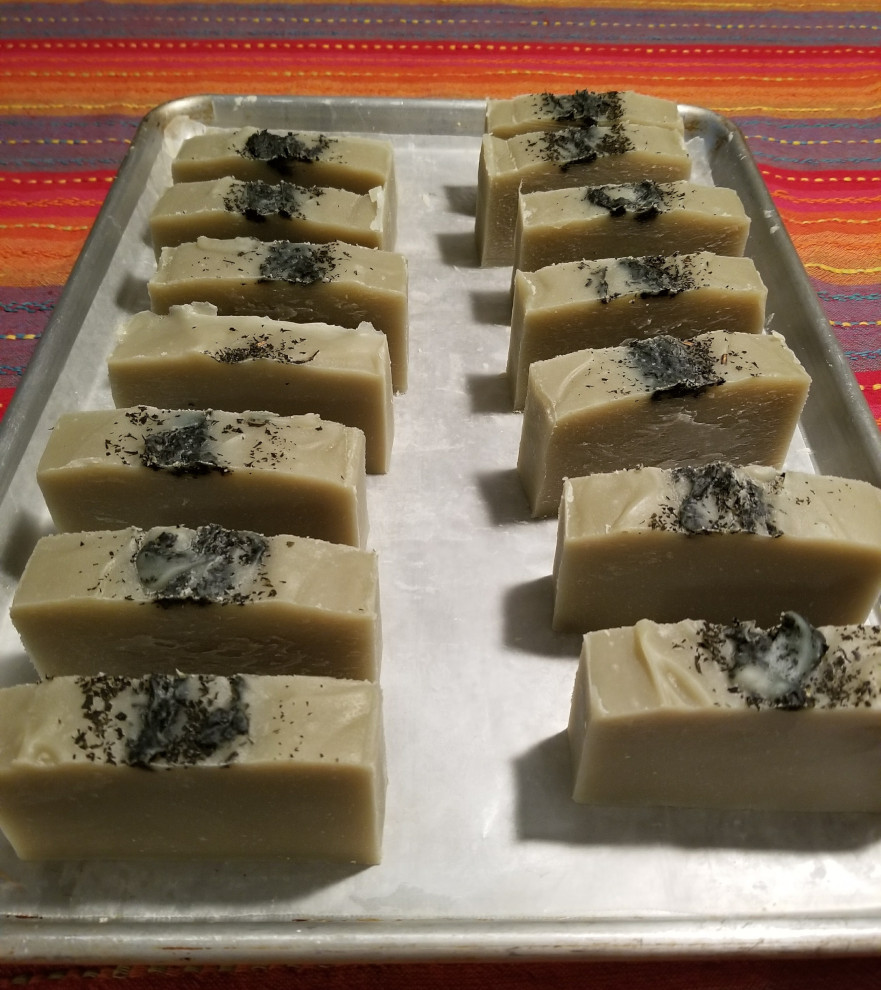
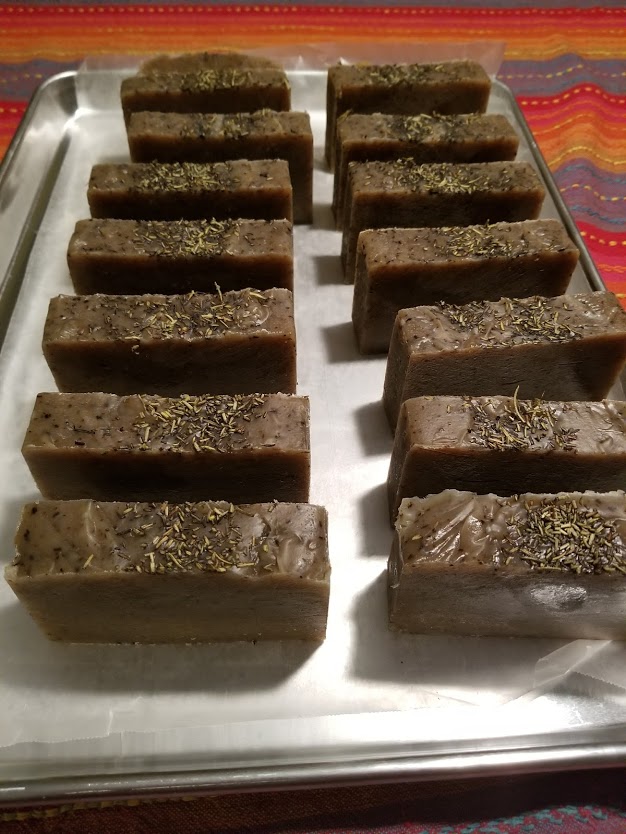
2.3 - Soap Photo Gallery
Blessings soap display
Chamomile tea honey soap
Garden mint soap
Orange patchouli soap
Rosemary mint soap
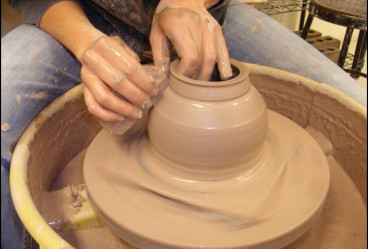
3 - Pottery
If you have ever worked with clay, you understand the enjoyment of opening the kiln after a firing to see the surprise that was created. I was able to take a pottery class in college and after graduating, invested in the essential equipment to do this art at home.
Introduction
In high school I took an art class. Though I learned a lot about drawing and basic painting, I admired the work going in the next studio with the pottery students. As a project, a guy in that class made an entire set of tableware for his mom for Christmas. I was not able to take the pottery class in high school for whatever reason. It wasn't until my last semester in college that I had one more class I needed to take to meet the general requirements. So, I took a pottery class. That class met Monday, Wednesday and Friday at 7:30AM. On Tuesday and Thursday, I had Business Law at 7:30AM. Strangely, I never had problems getting to class on time on Monday, Wednesday and Friday. I found that I had to drag myself to class on Tuesday and Thursday. I guess that shows you where my heart was!
In the past 30 or so years, I haven’t been able to do much with pottery. When I was able to pick it back up, with kids and keeping up with their schedule, I could not do much here. To work with pottery, you wait on the clay; it doesn’t wait on you. I concentrated on woodworking since wood waits on you. I now, with woodworking, have a shortage of space. I dream of having a multi-room workshop that I can enjoy both hobbies.
 I have been asked what hobby is my favorite. I usually reply that hobbies is my hobby. For me, the enjoyment is the challenge for learning something new and apply some creativity in making something.


 This paper documents the steps to turn a basic peppermill design on the wood lathe using the Rockler 8” peppermill kit (#50936). It will take 4 to 4-1/2 hours to build.