Simple Bowl Turning
Introduction
This paper documents the steps to turn a basic, simple bowl on the wood lathe.
Safety

Safety is important in all aspects for woodworking, but particularly so with working on the wood lathe. Wood sometimes can be unstable, possibly not secured to the lathe properly, etc. Wearing the right type of safety equipment is imperative.
It is wise to use both safety glasses and a face shield. Protect your hearing with hearing protectors such as sound deadening headphones. Depending on the wood, a dust mask is needed. Remember you have one life, one face, one set of lungs. It only takes one accident to change or even terminate your life.
Tools
Here is a list of tools needed for turning your simple bowl:
- Ruler.
- Pencil.
- Awl.
- Chuck with expandable jaws and wormscrew. These will be used to hold the stock in the headstock of the lathe. If you have a “reversible” lathe (meaning the motor runs either direction), you will need a chuck that is reverse compatible.
- Turning tools – carbide tools are the best for the beginner. They are straightforward, simple to master and does not require sharpening. For this bowl, we will use the round tip for roughing out, the square tip for squaring and some finishing and the diamond tip for creating a “dovetail mortise” in the bowl bottom so that the chuck jaws can hold onto it.
- Live center. A conical one is best as it allows the greatest area around the center to be worked.
- Divider or compass.
- Depth gauge (optional).
- Bradpoint drill bit – 19/64” (8mm) for drilling the pilot hole on your wood blank to be mounted on the wormscrew.
Supplies
Here is a list of supplies you will need for turning your simple bowl:
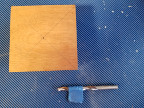
- Wood – 4” X 4” X 2”, any specie.
- Various grits of sandpaper. A woodturner’s sandpack is good to have.
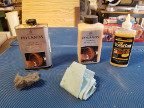
- Wood sealer suitable for woodturning.
- Friction finish suitable for woodturning.
- Paper towels for applying the sealer and finish.
- Steel wool.
Procedure
From corner to opposite corner, strike a line. Do the same on the adjacent corner. This “X” mark will give you the center point of your wood. Sometimes your wood blank may not be perfectly square and your center will not be perfect. This is fine since we will be rounding the stock down and it will be round according to the center that is marked.
In this tutorial, we are using the Nova G3 chuck. The wormscrew on this make of chuck technically needs an 8mm bradpoint bit. A 19/64” bit works fine for medium density hard woods. Softer woods will need a smaller size, harder woods will need a larger bit.
Use painter’s tape and mark off for a ¾” deep hole. We do this in order to drill a pilot hole in the wood so that we can fully mount the wood blank to the wormscrew and not drill into what will be the base of our bowl.
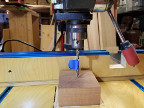
Preferably, use a drill press to drill the pilot hole into the wood blank, not drilling deeper that what is marked by the painter’s tape. It is important that the hole is straight. This will allow us to more easily round the woods blank and utilize all the surface of the wood as is possible.
TIP: Be sure to drill ¼ – ½” at a time, backing out the bit so that the waste sawdust can surface. It you don’t, your hole size could be affected not to mention shorten the life of your drill bit due to friction heat.
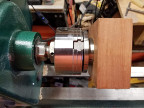
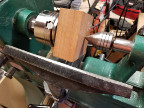
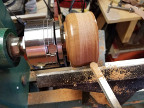
With your chuck in place on the headstock, tighten the set screw (if a reversible chuck on a reversible capable lathe). Tighten the wormscrew in the chuck in a way that it makes the most contact within the jaws.
With the stop lock engaged on the lathe, if it has it or use the chuck key in the chuck to hold the chuck stationary, screw the wood blank onto the wormscrew. IMPORTANT: the wood blank must be screwed down securely against the jaw set – this is for your safety
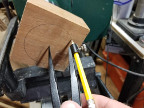
Using the divider or compass, measure a radius of 1” and draw a circle out from the dimple in the center of the wood blank. This will be where we later cut the “dovetail mortise” to be used by the chuck to hold the blank from the bowl’s bottom and finished footing.
In the tailstock, insert the conical live center and position the tailstock up to the wood blank. Tighten the tailstock so that it is securely supporting the wood blank from the right side. This is an extra safety precaution to keep the wood stable, especially while performing the initial rough cuts.
Move the tool rest into place, square in front of the wood blank. Test the most narrow gap to be about 3/8”. It is important that the corners of the blank do not hit the tool rest.
**IMPORTANT:** Always have the lathe powered off while adjusting the tailstock, headstock, or tool rest. Not doing so, may mean your fingers get pulled into lathe unexpectedly.
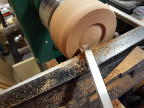
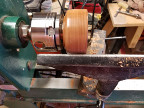
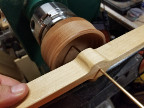
Round the blank into a round cylinder. Using the round tip tool on a medium speed, start near the left side of the blank and take light cuts. Turn towards the end. Do not start on the end and cut away from the end. Doing so, may produce tear-out.
Remember that you are turning a square object into a round one. You will start out turning more air than wood. As you round the blank, you will be cutting more wood and can take more aggressive cuts.
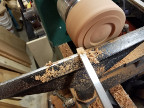
Work from the middle to the right end. Do not start on the right end and work toward the center for the same reason stated above, for the same reason.
Work to even the cut across the blank, alternating this step until a round surface has been rough cut. It is good to turn off the lathe periodically to check your work.
TIP: It is natural to keep your eyes on the tool over the tool rest. However, if you glance at the top periodically, you can better see how much “air gap” you have left or inspect the profile of your turning.
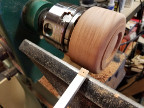
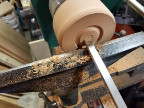
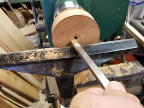
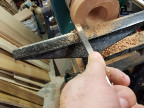
We now cut the “dovetail mortise”. Stop the lathe, back the tailstock off and reposition the tool rest so it is parallel with the end of the blank.
Using the diamond tip tool, angle your first cut at the circle drawn on the end.
After an initial cut, you’ll need to work further from the inside of the circle toward the circle in order to clear material that inhibits your diamond tool from making that angled (aka dovetail) cut.

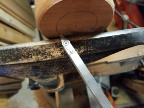
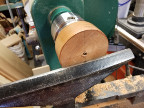
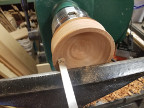
Using the square tool, start to square up the footing of the bowl.
Using the round tool, start carving out the bottom of the bowl. Be sure to move the tool from the center outward, not the other way around.
Ideally, we are striving to have a curve that has the visual appearance to be continual from the bottom of the bowl to the upward curve on the side of the bowl. Supplement with using the square tool for smoothing.
Shape the outer edge of the bowl. By now, you should have developed a feel for how the turning tools work. Use the tool you feel comfortable with to shape this outer edge.
Do not cut the entire foot off! Remember that our bowl bottom serves two purposes: (1) provide a hold when we go to hollow out the inside and (2) provide a stable finished foot that won’t affect the bowl’s “flatness” after it is finished. Wood breathes and can change shape over time. Having a smaller surface for a footer helps to maintain a flat surface over time in a way that the bowl won’t rock.

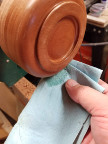
Stop the lathe and remove the tool rest. On a low speed, beginning with 150 grit sandpaper, start rough sanding. Notice that the side of the bowl is a combination of straight and end grain. The two sand differently, possibly with different results.
Work from the 150 grit to 600 grit. Most of your sanding will done using the rougher grits. The higher grits, just refine the smoothness while the rougher grits do more for shaping and shortening the wood fibers that would ordinarily stand up, if the wood was dampened which would affect the final finish.
Using the round tool, start carving out the bottom of the bowl. Be sure to move the tool from the center outward, not the other way around.
***TIP:*** If you are working with a coarse grain wood and desire to fill in the coarse grain before final finish, sand the bowl from the bottom, retaining the sanding dust on the sand paper. Set the sandpaper aside with the sanding dust retained. Apply the alcohol based sanding sealer (see below) and reapply the retained sanding dust about half way before the sealer dries. Do this 3-4 times with the 150 and 240 grits or as needed to completely fill in the grain.
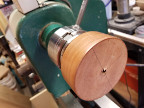
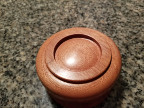
You are now ready to “finish” the bottom of the bowl. With this technique, we will not have to re-mount the bowl a second time to apply the finish to the bottom.
Apply the sanding sealer. With the lathe running on a low speed, use a paper towel and put a small amount of the sealer on the bowl. Wait for the alcohol to evaporate and use the steel wool to sand down the sealer.
This can be done multiple times depending on how porous the wood is. It helps to wait 10 minutes if the wood is acting like a sponge.
Your work should look more smooth and shiny.
Apply the friction polish to the bottom of the bowl. Using the same technique as the sealer, apply the friction polish. The friction polish will build up to produce the gloss you desire.
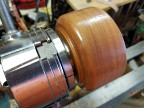
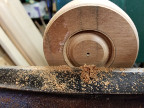
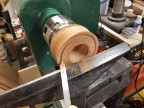
With the lathe stopped, unscrew the bowl. Remove the wormscrew. Tighten (expand) the chuck jaws so that you can mount the bowl bottom using the “dovetail mortise” you have just finished.
Position the tool rest parallel to the bowl side. True up the side again and create the final outside shape. It is normal for the bowl to be a little out of kilter.

Stop the lathe. Measure and set your depth gauge. This is done by sight.
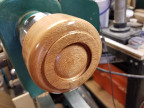
Position the tool rest parallel to the bowl top. Using the round tool, start carving out the center of the bowl. Begin on the left side of the old pilot hole and work toward the left, taking small cuts. For now, we are just “hogging out” the center. This is where the most material will be taken out.
Square the outer edge for where the bowl top will be using the square tool.
Start turning the side wall cut using the diamond tool. Work back and forth between opening and thinning the bowl bottom and turning the side. Be sure to thin the top side of the bowl before the bottom of the side. You want to keep as much support as possible on your piece while you are turning.
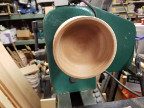
Let’s take a moment to discuss physics on completing the inside of the bowl. Wood has natural strength but becomes weaker the thinner the wood is worked. Also wood is weaker to work end grain than long grain. As we hog out the inside, in order to maintain the most strength in the wood, we leave the bottom of the walls thicker than the top. As we reach the thickness at the top of the bowl, we work down the wall thinning the wood gradually. The picture on the right shows this technique.
Using the depth gauge, set the depth for how deep we will carve out the interior of the bowl. Use this periodically to check how much further we need to cut.

As with the bowl bottom, finish the exterior and interior of the bowl as the bowl. There is no need to finish the bottom that is in the chuck since it was already completed.